Uncategorized

581 Sensory Words to Take Your Writing from Bland to Brilliant

It’s almost too easy.

By using sensory words to evoke sight, sound, touch, taste, and smell; smart and attractive writers just like you are able to make their words burst to life in their readers’ minds.

In this post, you’ll learn:

  • The science behind sensory details (e.g. why sensory words are so persuasive);
  • The definition of sensory words (plus examples);
  • How answering five simple questions will help you write descriptive words that pack your content with sensory language;
  • 500+ sensory words you can incorporate into your own writing (right now).

Let’s dive in.

The Colossal Power of Sensory Details

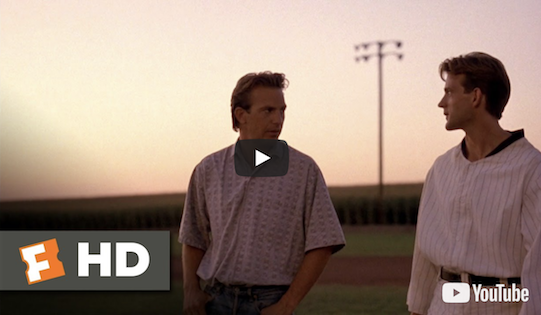
Remember the final scene in Field of Dreams when Ray Kinsella has a catch with his dad?

You can smell the grass on the field.

You can hear the sound of the baseball hitting their gloves.

And you can feel Ray’s years of guilt melting away as he closes his eyes, smiles, and tosses the ball back to his dad.

(Be honest. You’re crying right now, aren’t you?)

Field of Dreams made you feel like you were in Ray’s shoes, on his field, playing catch with dad.

The scene creates such a vivid experience for many viewers that whenever they think of playing catch, this scene will come up alongside their own childhood memories.

Here’s why:

When you paint a strong scene in your audience’s mind, you make it easier for them to pull it back up from their memory. You’ve essentially bookmarked it for them so they can easily find it when something — a sight, a smell, a sound — reminds them of it.

That’s the power of content that incorporates sensory details.

And this power isn’t limited to cinema classics capable of making grown men cry. For centuries, literary giants have been packing their prose with powerful words that evoke the senses:

“Cry ‘Havoc,’ and let slip the dogs of war;
That this foul deed shall smell above the earth
With carrion men, groaning for burial”
— William Shakespeare (circa 1599)

In addition to The Bard, authors like Maya Angelou, Edgar Allan Poe, and Charles Dickens excel at sensory language. So do literally every famous poet you learned about in school.

And that begs the obvious question…

Why are Sensory Details so Effective?

Short answer:

Our brains handle sensory words differently than ordinary words.

In a 2011 study published in The Quarterly Journal of Experimental Psychology, experts found that our brains process “tangible” (i.e. sensory) words faster than other words.

And in a study published for Brain and Language in 2012, psychologists found that a certain part of our brain is “activated” when we read sensory words.

In other words:

science

So, we know why sensory details are powerful. And we know writers have been tapping into their power for a long, long time.

Now let’s define them and go over a few examples:

What are Sensory Words?

Sensory words are descriptive words — using imagery, they describe how we see, hear, touch, taste, and smell the world around us.

Let’s break each one down:

#1. Sight Sensory Words


Words related to vision describe the appearance of something (its color, size, shape, and so on).

Examples of visual words:

  • Her golden hair looked disheveled thanks to the gust of wind.
  • He was a towering presence.
  • I ordered a large orange juice, but the waiter brought me a teeny-tiny glass the size of a thimble.

→ Click here to unfold the full list of Sight Sensory Words.

Angular
Azure
Billowy
Black
Bleary
Bloated
Blonde
Blue
Blurred
Blushing
Branching
Bright
Brilliant
Broad
Brown
Brunette
Bulbous
Bulky
Camouflaged
Chubby
Circular
Colorful
Colorless
Colossal
Contoured
Cosmic
Craggy
Crimson
Crinkled
Crooked
Crowded
Crystalline
Curved
Dark
Dazzling
Deep
Dim
Dingy
Disheveled
Distinct
Drab
Dreary
Dull
Dusty
Elegant
Enchanting
Engaging
Enormous
Faded
Fancy
Fat
Filthy
Flashy
Flat
Flickering
Foggy
Forked
Freckled
Fuzzy
Gargantuan
Gaudy
Gigantic
Ginormous
Glamorous
Gleaming
Glimpse
Glistening
Glitter
Glittering
Globular
Gloomy
Glossy
Glowing
Gold
Graceful
Gray
Green
Grotesque
Hazy
Hollow
Homely
Huge
Illuminated
Immense
Indistinct
Ivory
Knotty
Lacy
Lanky
Large
Lavender
Lean
Lithe
Little
Lofty
Long
Low
Malnourished
Maroon
Massive
Miniature
Misshapen
Misty
Motionless
Mottled
Mountainous
Muddy
Murky
Narrow
Obtuse
Olive
Opaque
Orange
Oval
Pale
Peered
Petite
Pink
Portly
Pristine
Prodigious
Purple
Quaint
Radiant
Rectangular
Red
Reddish
Rippling
Rotund
Round
Ruby
Ruddy
Rusty
Sabotaged
Shadowy
Shallow
Shapeless
Sheer
Shimmering
Shiny
Short
Silver
Skinny
Small
Smudged
Soaring
Sparkling
Sparkly
Spherical
Spotless
Spotted
Square
Steep
Stormy
Straight
Strange
Striped
Sunny
Swooping
Tall
Tapering
Tarnished
Teeny-tiny
Tiny
Towering
Translucent
Transparent
Triangular
Turquoise
Twinkling
Twisted
Ugly
Unsightly
Unusual
Vibrant
Vivid
Weird
White
Wide
Wiry
Wispy
Wizened
Wrinkled
Wrinkly
Yellow


#2. Sound Sensory Words


Words related to hearing often describe the sound they make (known as onomatopoeia), but this isn’t always the case.

Examples of hearing words:

  • He had a big, booming voice.
  • The sound of screeching tires was soon followed by the deafening sound of a car horn.
  • As I peeked under the bed, the cackling laughter coming from the closet made the hairs on my arms stand up.

→ Click here to unfold the full list of Sound Sensory Words.

Babble
Bang
Barking
Bawled
Bawling
Bellow
Blare
Blaring
Bleat
Boom
Booming
Bray
Buzz
Buzzing
Cackle
Cackling
Chatter
Chattering
Cheer
Chiming
Chirping
Chuckle
Clamor
Clang
Clanging
Clap
Clapping
Clicking
Clink
Clinking
Cooing
Coughing
Crackle
Crackling
Crashing
Creak
Croaking
Crow
Crunch
Crunching
Crunchy
Cry
Crying
Deafening
Distorted
Dripping
Ear-piercing
Earsplitting
Exploding
Faint
Fizzing
Gagging
Gasping
Giggle
Giggling
Grate
Grating
Growl
Grumble
Grunt
Grunting
Guffaw
Gurgle
Gurgling
Hanging
Hiss
Hissing
Honking
Howl
Hubbub
Hum
Humming
Hush
Jabber
Jangle
Jangling
Laughing
Moaning
Monotonous
Mooing
Muffled
Mumble
Mumbling
Murmur
Mutter
Muttering
Noisy
Peeping
Piercing
Ping
Pinging
Plopping
Pop
Purring
Quacking
Quiet
Rant
Rapping
Rasping
Raucous
Rave
Ringing
Roar
Roaring
Rumble
Rumbling
Rustle
Rustling
Scratching
Scream
Screaming
Screech
Screeching
Serene
Shout
Shouting
Shrieking
Shrill
Sigh
Silent
Sing
Singing
Sizzling
Slam
Slamming
Snap
Snappy
Snoring
Snort
Splashing
Squawking
Squeaky
Stammer
Stomp
Storm
Stuttering
Tearing
Thudding
Thump
Thumping
Thunder
Thundering
Ticking
Tingling
Tinkling
Twitter
Twittering
Wail
Warbling
Wheezing
Whimper
Whimpering
Whine
Whining
Whir
Whisper
Whispering
Whistle
Whooping
Yell
Yelp


#3. Touch Sensory Words


Touch words describe the texture of how something feels. They can also describe emotional feelings.

Examples of touch words:

  • Two minutes into the interview, I knew his abrasive personality would be an issue if we hired him.
  • With a forced smile, I put on the itchy Christmas sweater my grandmother bought me.
  • The Hot Pocket was scalding on the outside, but ice-cold in the middle.

→ Click here to unfold the full list of Touch Sensory Words.

Abrasive
Balmy
Biting
Boiling
Breezy
Bristly
Bubbly
Bubby
Bumpy
Burning
Bushy
Chilled
Chilly
Clammy
Coarse
Cold
Cool
Cottony
Crawly
Creepy
Cuddly
Cushioned
Damp
Dank
Dirty
Downy
Drenched
Dry
Elastic
Feathery
Feverish
Fine
Fleshy
Fluff
Fluffy
Foamy
Fragile
Freezing
Furry
Glassy
Gluey
Gooey
Grainy
Greasy
Gritty
Gushy
Hairy
Heavy
Hot
Humid
Ice-Cold
Icy
Itchy
Knobbed
Leathery
Light
Lightweight
Limp
Lukewarm
Lumpy
Matted
Metallic
Moist
Mushy
Numbing
Oily
Plastic
Pointed
Powdery
Pulpy
Rocky
Rough
Rubbery
Sandy
Scalding
Scorching
Scratchy
Scummy
Serrated
Shaggy
Sharp
Shivering
Shivery
Silky
Slimy
Slippery
Sloppy
Smooth
Smothering
Soapy
Soft
Sopping
Soupy
Splintery
Spongy
Springy
Sputter
Squashy
Squeal
Squishy
Steamy
Steely
Sticky
Stifled
Stifling
Stinging
Stony
Stubby
Tangled
Tapered
Tender
Tepid
Thick
Thin
Thorny
Tickling
Tough
Unsanitary
Velvety
Warm
Waxy
Wet
Woolly


#4. Taste Sensory Words


Taste words are interesting. Though they can describe food, they’re often used in comparisons and metaphors.

Examples of taste words:

  • It’s a bittersweet situation.
  • Her zesty personality caught Karl’s eye.
  • The scrumptious jalapeno poppers comforted Karl after his bitter rejection.

→ Click here to unfold the full list of Taste Sensory Words.

Acidic
Appetizing
Bitter
Bittersweet
Bland
Buttery
Charred
Contaminated
Creamy
Crispy
Delectable
Delicious
Doughy
Earthy
Fermented
Flavorful
Flavorless
Floury
Garlicky
Gingery
Gritty
Hearty
Juicy
Luscious
Medicinal
Mellow
Melted
Nauseating
Nutritious
Nutty
Palatable
Peppery
Pickled
Piquant
Raw
Refreshing
Rich
Ripe
Runt
Savory
Scrumptious
Stale
Sugary
Syrupy
Tangy
Tart
Tasteless
Unripe
Vinegary
Yummy
Zesty


#5. Smell Sensory Words


Words related to smell describe — yes, you guessed it — how things smell. Often underutilized, sensory words connected with smell can be very effective.

Examples of smell words:

  • The pungent smell was unmistakable: someone in this elevator was wearing Axe Body Spray.
  • No matter the expiration date, it was clear from its rancid stench the milk had gone bad.
  • The flowery aroma was a welcome change after the elevator and milk incidents.

→ Click here to unfold the full list of Smell Sensory Words.

Ambrosial
Antiseptic
Aroma
Aromatic
Briny
Citrusy
Decayed
Decomposed
Doggy
Fetid
Floral
Flowery
Foul-smelling
Fragrant
Gamy
Gaseous
Horrid
Inodorous
Malodorous
Mephitic
Musky
Musty
Odiferous
Odor
Odorless
Old
Perfumed
Piney
Polluted
Pungent
Putrid
Rancid
Rank
Redolent
Reeking
Scent
Scented
Sickly
Skunky
Smell
Smoky
Stagnant
Stench
Stinky
Sweaty
Tempting


Note on Taste and Smell:


Because they’re closely related, some sensory words can be used for both taste and smell. Examples: fruity, minty, and tantalizing.

→ Click here to unfold the full list of Taste and Smell Sensory Words.

Acrid
Burnt
Fishy
Fresh
Fruity
Lemony
Minty
Moldy
Mouth-watering
Rotten
Salty
Sour
Spicy
Spoiled
Sweet
Tantalizing


Sensory Details: Examples in the Wild

Imagine the following headline came across your Twitter feed:

How to Avoid Using Boring Stock Photo Images in Your Content

Would you click it?

Better question…

Could you read the headline without falling asleep?

The answers are probably “no” and “heck no.”

Now imagine you saw this headline:
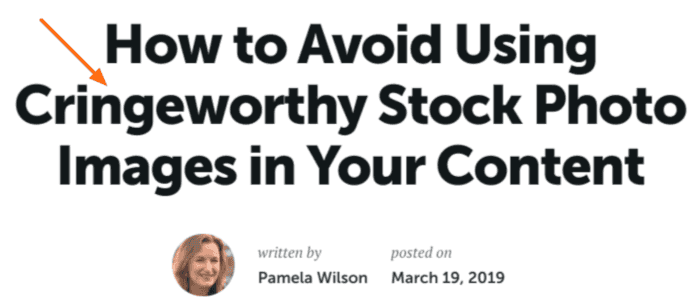
Sensory Words in Headlines

Much better, right?

The simple addition of the sensory word “cringeworthy” changes the tone of the entire headline. Instead of yawning, you’re thinking of an awkward or embarrassing moment you really don’t want to relive.

Let’s look at a few more modern-day examples of sharp people using sensory language to spruce up their content:

Using Sensory Words in Author Bios


I’ll pick on me for this one.

Here’s the author bio I used for one of my first-ever guest posts:

Kevin Duncan is the owner of Be A Better Blogger, where he helps people become the best bloggers they can be.

Now look at the author bio my friend Henneke wrote for Writer’s Block: 27 Techniques to Overcome It Forever:

Henneke Duistermaat is an irreverent copywriter and business writing coach. She’s on a mission to stamp out gobbledygook and to make boring business blogs sparkle.

My bio is devoid of sensory words (or any interesting words at all, if we’re being honest).

Henneke’s is chock full of them.

Her bio is interesting.

Mine is boring.

The lesson? Add at least one sensory word to your author bio.

Using Sensory Words in Social Media Profiles


Some people opt for brevity when writing their social media profiles, and that’s fine.

But if you want your Twitter profile (or Facebook, Instagram, or any other social media profile) to stand out from the crowd, sprinkle in a sensory word or two.

Like so:

Sensory Words in Twitter Profiles

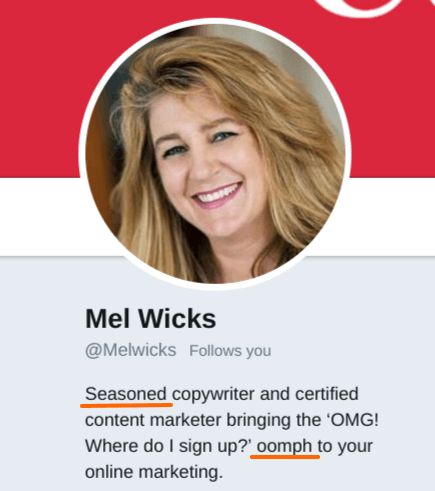
Mel Wicks is a veteran copywriter who knows a thing or two about the effectiveness of descriptive words, so she uses them to spice up her Twitter profile.

Here’s an example from my badly-neglected Instagram account:

Sensory Words in Instagram Profile

“Enchanting” and “adorably-jubilant” are wonderful sensory words — so wonderful, it’s a shame they’re wasted on a profile no one sees.

Look at your own profiles and see if there’s a place to add a sensory word or two. They’ll help your profile jump off the screen.

Heck, see if you can use enchanting and adorably-jubilant.

They deserve to be seen.

Using Sensory Words in Introductions


The opening lines of your content are so important.

If you’re a student, your opening sets the tone for your teacher (who we both know is dying to use his red pen).

If you’re an author, your opening can be the difference between someone buying your book or putting it back on the shelf in favor of one of those Twilight books (probably).

And if you’re a blogger, writer, content marketer, or business; your opening can hook the reader (increasing dwell time, which is great in Google’s eyes) or send them scurrying for the “back” button.

It’s why we put such an emphasis on introductions here at Smart Blogger.

Sometimes our openings hook you with a question.

Sometimes we strike a note of empathy or (like this post) focus on searcher intent.

And sometimes we give you a heaping helping of sensory words:

Imagine you’re sitting in a lounge chair on the beach, staring out over the glittering sea, the ocean breeze ruffling your hair, listening to the slow, steady rhythm of the waves.

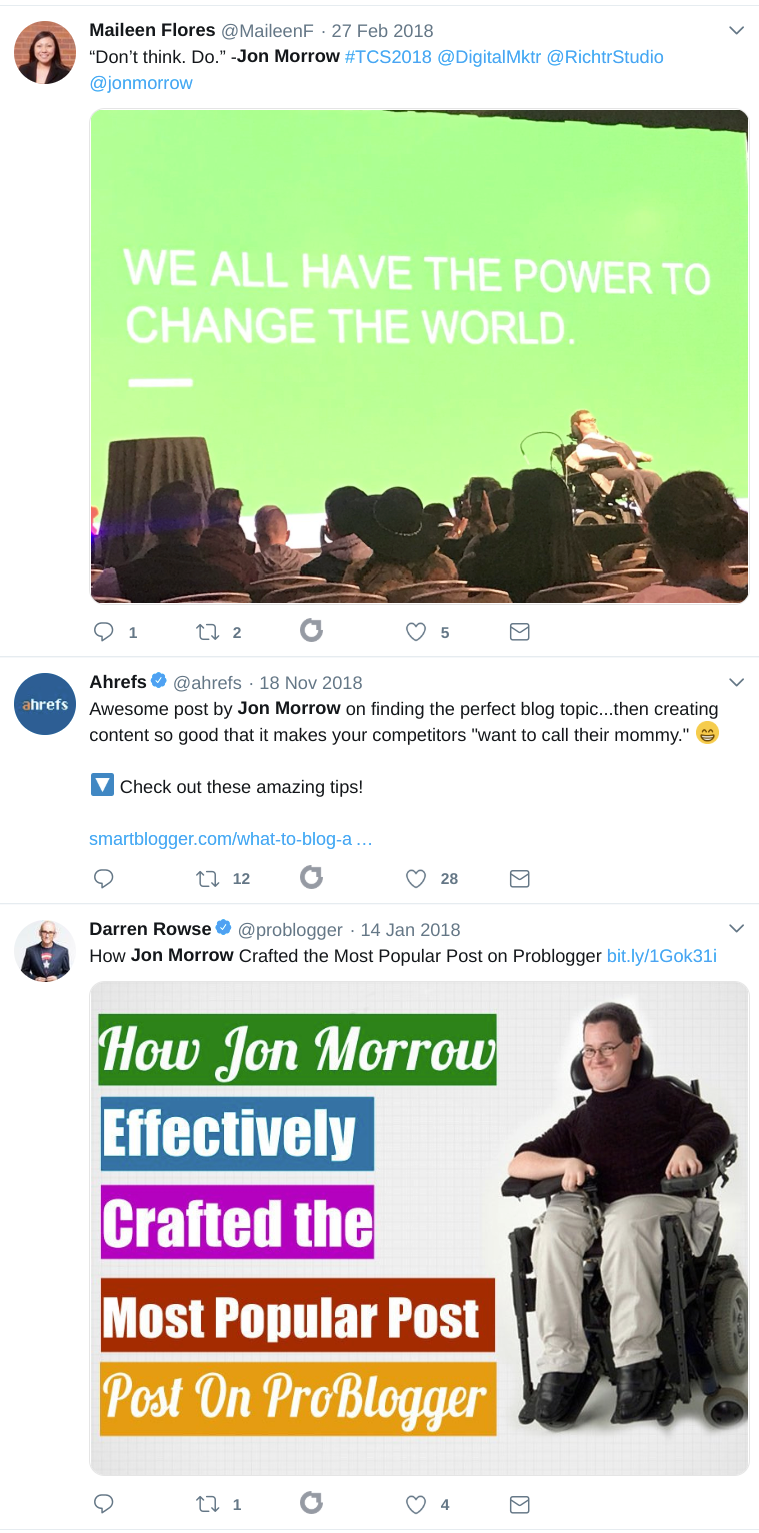
In the above opening for How to Become a Freelance Writer and Get Paid $200 – $1K per Post, Jon Morrow uses sensory language to set a scene for the reader.

And it’s highly, highly effective.

Using Sensory Words in Email Subject Lines


Like you, your readers are flooded with emails.

And with open rates in a steady decline, people are trying anything and everything to make their email subject lines stand out:

  • Emojis;
  • Capitalized words;
  • All lowercase letters;
  • Two exclamation points;
  • Clickbait that would make even BuzzFeed go, “that’s too far, man.”

You name it, people are trying it.

Want a simpler, far-more-effective way to help your emails stand out from the crowd?

Add a sensory word.

Brian Dean loves to include words like “boom” in his subjects:

Sensory Words in Email Subjects

The folks at AppSumo and Sumo (formerly SumoMe) regularly feature descriptive words in their subjects and headlines.

Here’s one example:

Sensory Words in Email Subjects

And sensory language appears in most everything Henneke writes, including her subject lines.

In this one she also uses an emoji related to her sensory word. Very clever:

Sensory Words in Email Subjects

Now that we’ve covered several examples, let’s dig a bit deeper…

Let’s discuss some practical steps you can take that will make adding sensory language to your writing a breeze:

How Descriptive Words Can Pack Your Writing With Sensory Language

If you’ve taken a good English or writing class, you’ve probably been told a time or two to “show, don’t tell.”

This means you should create an engaging experience for your audience; not just tell them what you want them to know.

You accomplish this by using descriptive language that conveys sensations and lets readers experience your words (rather than simply read them).

And how do you do that, exactly?

Ask yourself these five questions when you’re writing:

#1. What Do You See?


It isn’t enough to tell your readers there was a scary house in your neighborhood when you were a child. Describe the house to them in vivid detail.

What shade of gray was it?

Were the doors boarded up?

Precisely how many ghostly figures did you see staring at you from the upstairs bedroom windows, and how many are standing behind you right now?

Paint a mental picture for your readers.

#2. What Do You Hear?


We listen to uptempo songs to push us through cardio workouts. Many of us listen to rainfall when we’re trying to sleep. Some of us listen to Justin Bieber when we want to punish our neighbors.

Want to transplant readers into your literary world?

Talk about the drip, drip, drip of the faucet.

Mention the squeaking floors beneath your feet.

Describe the awful music coming from your next-door-neighbor’s house.

#3. How Does it Feel?


Touch sensory words can convey both tactile and emotional sensations.

Can you describe to the reader how something feels when touched? Is it smooth or rough? Round or flat? Is it covered in goo or is it goo-less?

Paint a picture for your reader so they can touch what you’re touching.

The same goes for emotions. Help the reader feel what you (or your character) are feeling. Draw them in.

#4. What Does it Taste Like?


Does the beach air taste salty? Is the roaring fire so intense you can taste the smoke? Is the smell of your roommate’s tuna fish sandwich so strong you can taste it from across the room?

Tell your audience.

Be descriptive.

Make them taste the fishiness.

#5. How Does it Smell?


It wasn’t a basement you walked into — it was a musty, moldy basement.

And you didn’t simply enjoy your Mom’s homemade lasagna. You inhaled the aromatic scents of sauce, cheese, and basil.

Evoking the sense of smell is possibly the most effective way to pull readers out of their world and into yours.

So when you sit down to write, ask yourself if it’s possible to describe how something smells. And if you can? Do it.

The Massive Sensory Words List: 581 (and Counting) Descriptive Words to Supercharge Your Writing

Once you’ve asked and answered the five questions above, your writing will be packed with sensory details.

In time, you’ll build up your own massive list of sensory words you can reference and sprinkle throughout your work.

But in the meantime, here’s my list.

Bookmark them.

Print them.

Use them often:

SIGHT

SOUND

Angular Babble
Azure Bang
Billowy Barking
Black Bawled
Bleary Bawling
Bloated Bellow
Blonde Blare
Blue Blaring
Blurred Bleat
Blushing Boom
Branching Booming
Bright Bray
Brilliant Buzz
Broad Buzzing
Brown Cackle
Brunette Cackling
Bulbous Chatter
Bulky Chattering
Camouflaged Cheer
Chubby Chiming
Circular Chirping
Colorful Chuckle
Colorless Clamor
Colossal Clang
Contoured Clanging
Cosmic Clap
Craggy Clapping
Crimson Clicking
Crinkled Clink
Crooked Clinking
Crowded Cooing
Crystalline Coughing
Curved Crackle
Dark Crackling
Dazzling Crashing
Deep Creak
Dim Croaking
Dingy Crow
Disheveled Crunch
Distinct Crunching
Drab Crunchy
Dreary Cry
Dull Crying
Dusty Deafening
Elegant Distorted
Enchanting Dripping
Engaging Ear-piercing
Enormous Earsplitting
Faded Exploding
Fancy Faint
Fat Fizzing
Filthy Gagging
Flashy Gasping
Flat Giggle
Flickering Giggling
Foggy Grate
Forked Grating
Freckled Growl
Fuzzy Grumble
Gargantuan Grunt
Gaudy Grunting
Gigantic Guffaw
Ginormous Gurgle
Glamorous Gurgling
Gleaming Hanging
Glimpse Hiss
Glistening Hissing
Glitter Honking
Glittering Howl
Globular Hubbub
Gloomy Hum
Glossy Humming
Glowing Hush
Gold Jabber
Graceful Jangle
Gray Jangling
Green Laughing
Grotesque Moaning
Hazy Monotonous
Hollow Mooing
Homely Muffled
Huge Mumble
Illuminated Mumbling
Immense Murmur
Indistinct Mutter
Ivory Muttering
Knotty Noisy
Lacy Peeping
Lanky Piercing
Large Ping
Lavender Pinging
Lean Plopping
Lithe Pop
Little Purring
Lofty Quacking
Long Quiet
Low Rant
Malnourished Rapping
Maroon Rasping
Massive Raucous
Miniature Rave
Misshapen Ringing
Misty Roar
Motionless Roaring
Mottled Rumble
Mountainous Rumbling
Muddy Rustle
Murky Rustling
Narrow Scratching
Obtuse Scream
Olive Screaming
Opaque Screech
Orange Screeching
Oval Serene
Pale Shout
Peered Shouting
Petite Shrieking
Pink Shrill
Portly Sigh
Pristine Silent
Prodigious Sing
Purple Singing
Quaint Sizzling
Radiant Slam
Rectangular Slamming
Red Snap
Reddish Snappy
Rippling Snoring
Rotund Snort
Round Splashing
Ruby Squawking
Ruddy Squeaky
Rusty Stammer
Sabotaged Stomp
Shadowy Storm
Shallow Stuttering
Shapeless Tearing
Sheer Thudding
Shimmering Thump
Shiny Thumping
Short Thunder
Silver Thundering
Skinny Ticking
Small Tingling
Smudged Tinkling
Soaring Twitter
Sparkling Twittering
Sparkly Wail
Spherical Warbling
Spotless Wheezing
Spotted Whimper
Square Whimpering
Steep Whine
Stormy Whining
Straight Whir
Strange Whisper
Striped Whispering
Sunny Whistle
Swooping Whooping
Tall Yell
Tapering Yelp
Tarnished
Teeny-tiny
Tiny
Towering
Translucent
Transparent
Triangular
Turquoise
Twinkling
Twisted
Ugly
Unsightly
Unusual
Vibrant
Vivid
Weird
White
Wide
Wiry
Wispy
Wizened
Wrinkled
Wrinkly
Yellow

TOUCH

TASTE

Abrasive Acidic
Balmy Appetizing
Biting Bitter
Boiling Bittersweet
Breezy Bland
Bristly Buttery
Bubbly Charred
Bubby Contaminated
Bumpy Creamy
Burning Crispy
Bushy Delectable
Chilled Delicious
Chilly Doughy
Clammy Earthy
Coarse Fermented
Cold Flavorful
Cool Flavorless
Cottony Floury
Crawly Garlicky
Creepy Gingery
Cuddly Gritty
Cushioned Hearty
Damp Juicy
Dank Luscious
Dirty Medicinal
Downy Mellow
Drenched Melted
Dry Nauseating
Elastic Nutritious
Feathery Nutty
Feverish Palatable
Fine Peppery
Fleshy Pickled
Fluff Piquant
Fluffy Raw
Foamy Refreshing
Fragile Rich
Freezing Ripe
Furry Runt
Glassy Savory
Gluey Scrumptious
Gooey Stale
Grainy Sugary
Greasy Syrupy
Gritty Tangy
Gushy Tart
Hairy Tasteless
Heavy Unripe
Hot Vinegary
Humid Yummy
Ice-Cold Zesty
Icy
Itchy
Knobbed
Leathery
Light
Lightweight
Limp
Lukewarm
Lumpy
Matted
Metallic
Moist
Mushy
Numbing
Oily
Plastic
Pointed
Powdery
Pulpy
Rocky
Rough
Rubbery
Sandy
Scalding
Scorching
Scratchy
Scummy
Serrated
Shaggy
Sharp
Shivering
Shivery
Silky
Slimy
Slippery
Sloppy
Smooth
Smothering
Soapy
Soft
Sopping
Soupy
Splintery
Spongy
Springy
Sputter
Squashy
Squeal
Squishy
Steamy
Steely
Sticky
Stifled
Stifling
Stinging
Stony
Stubby
Tangled
Tapered
Tender
Tepid
Thick
Thin
Thorny
Tickling
Tough
Unsanitary
Velvety
Warm
Waxy
Wet
Woolly

SMELL

TASTE & SMELL

Ambrosial Acrid
Antiseptic Burnt
Aroma Fishy
Aromatic Fresh
Briny Fruity
Citrusy Lemony
Decayed Minty
Decomposed Moldy
Doggy Mouth-watering
Fetid Rotten
Floral Salty
Flowery Sour
Foul-smelling Spicy
Fragrant Spoiled
Gamy Sweet
Gaseous Tantalizing
Horrid
Inodorous
Malodorous
Mephitic
Musky
Musty
Odiferous
Odor
Odorless
Old
Perfumed
Piney
Polluted
Pungent
Putrid
Rancid
Rank
Redolent
Reeking
Scent
Scented
Sickly
Skunky
Smell
Smoky
Stagnant
Stench
Stinky
Sweaty
Tempting

Are You Ready to Unleash the Power of Sensory Words?

It’s time to say goodbye.

Goodbye to lifeless words that sit on the page.

Goodbye to indifferent readers ready to move on to something, anything, else.

You now know why sensory details are so effective. You know how to sprinkle descriptive words throughout your content. And you now have a massive, ever-growing list of sensory words to bookmark and come back to again and again.

Variations of the following quote have been attributed to everyone from Carl W. Buehner to Maya Angelou, but regardless of who said it, and how they said it, it’s true:

“People may forget what you said, but they’ll never forget how you made them feel.”

It’s time to make your readers feel.

Are you ready?

Then let’s do this thing.

About the Author: When he’s not busy telling waitresses, baristas, and anyone else who crosses his path that Jon Morrow once said he was in the top 1% of bloggers, Kevin J. Duncan is the Blog Editor and Social Media Manager for Smart Blogger.

The post 581 Sensory Words to Take Your Writing from Bland to Brilliant appeared first on Smart Blogger.

Source: https://smartblogger.com/sensory-words/

Uncategorized

How to Write a Blog Post in 2019: The Ultimate Guide

Here’s the thing:

There are many tutorials that can teach you how to write a blog post.

They can educate you on the mechanics of blogging, what to do, and what not to do.

Read them and you can learn how to craft a perfectly serviceable blog post. Heck, you might even write something that wins you an adoring fan or two.

But if you dream bigger, if you want to know how to write a blog post that cuts through the noise and wins you legions of fans, you need something better than a run-of-the-mill tutorial.

You need an ultimate guide.

In this post, this ultimate guide, we’ll share tips used by professional writers to create spellbinding posts that are adored by thousands. You’ll learn the secrets to crafting irresistible headlines, seducing introductions, captivating advice, and motivational closings.

You’ll even learn how the pros refine and polish their posts once they’re finished writing them.

These are secrets many bloggers would gladly pay real money to learn, but it won’t cost you a thing — other than a few minutes of your time.

Let’s dive in.

Want Smart Blogger’s Ultimate Editing Checklist — a 22-point cheatsheet for polishing your post to perfection? Click herehttps://blogtraffic.lpages.co/leadbox-1498077769.js to download it for free.


Step #1. Craft a Headline That Readers Can’t Resist

Want to know one of the biggest mistakes bloggers make?

Writing the blog post before the headline.

Without a headline, they have no roadmap to follow. And so their post goes in multiple directions, leaving readers feeling dizzy, confused and disoriented.

And then they try to create a headline that embraces all that madness. Bloggers, have mercy!

If you want to write a blog post full of clarity, conciseness and conviction, spend some time crafting a quality headline that sets a clear destination, lures readers in, and leaves them eager for your advice.

Your headline will be your map, your writing navigation system, letting you know which literary roads to choose and which to avoid so that readers reach the intended destination as easily and efficiently as possible.

Follow these 8 rules to craft your killer headline:

Headline Rule #1. Pick a Mouth-Watering Topic


Want your blog post to get opened?

Then your headline must promise readers the very answer to whatever is tormenting them. The thing that keeps them up at night.

Your headline should not promise them a trip to the moon and back — readers are way too swift for such shenanigans. Keep the benefit specific and narrow, and readers will feel compelled to click and get the solution to what’s bugging them.

How do you find out what’s bugging your readers? Research:

  • Review comments on your posts and on posts of other sites in your niche.
  • Send your subscribers surveys asking them what their greatest struggles are.
  • Use tools like BuzzSumo to find out what the most popular posts in your niche are (which gives insight into your target readers’ needs).
  • Read the reviews of books in your niche on Amazon (you’ll find a gold mine of feedback to explore).

You have one responsibility as a blogger — yup, just one. And that is to serve your audience. The better you know them, the better you serve.

Before you know it, you’ll know them so intimately they’ll feel like you’re reading their minds, and your headlines will reflect that.

Example:

Let’s say you’re in the self-improvement space and you wrote the headline below:

How to Create an Amazing Life

This headline is so broad it’s unlikely to draw readers in. No one loses sleep over “wanting to create an amazing life.” They lose sleep over specific aspects of their lives that have left them unfulfilled.

So you are better off narrowing in on something specific that’s bugging your readers, such as:

How to Boldly Pursue Your Dreams Even if You’re Scared and Insecure

Narrowing in on something specific makes readers feel like you have the answers they’re looking for.

Headline Rule #2. Steal from the Pros


Okay, you’ve done your research and you know exactly what your readers need. Now it’s time to turn your topic into into a killer headline.

The easiest way to master the art of writing headlines? Steal.

Not in the unethical way. In the smart and efficient way.

Decades of copywriting and advertising research have revealed the types of headlines that have proven to be successful. The types of headlines that zap readers out of their info-overload comas and compel them to open. Why mess with that research?

If you want your headlines to grab readers, stick with what works.

No, your headlines don’t need to sound like they came straight from BuzzFeed. They can reflect your voice and style.

But until you’re as skilled a writer as Jon Morrow, let the proven templates be your guide (how do you think he got so good at writing headlines?).

Blogging is hard enough, so if you have templates at your fingertips, why not use them?

The easiest templates to start with? “How to” headlines and list post headlines. They are classics and they work. In fact, 75% of Smart Blogger’s most popular posts use these formats.

Examples:

Here are a number of Smart Blogger headlines that follow the “how to” and list post templates.

“How to” Headlines:

List Post Headlines:

Note: You can download Jon’s free 52 Headline Hacks, where you’ll find more template options than you’ll ever need.

Headline Rule #3. Engage Your Senses


Vague headlines leave readers feeling empty. Tangible headlines leave them feeling understood.

How to you create tangible headlines? Put yourself in the shoes of your reader.

How do they feel? What do they see, taste, or smell? What do they hear?

Engage all of your senses. The more your headline gives voice to their exact experience, the more they’ll feel like your post was written for them.

Example:

Let’s say you blog about health and wellness and you wrote a headline called:

5 Steps to Take When a Migraine Hits

This headline follows a proven list post formula, and it narrows in on something that’s bugging readers. All in all it’s not too bad, but it could be even more concrete.

To step it up a notch, put yourselves in the shoes of your readers. Think about exactly what they’re experiencing.

Perhaps that would lead you to the following:

5 Ways to Soothe Pounding and Blinding Migraines

If you suffer from migraines, there’s no way you could resist clicking such a headline.

Headline Rule #4. Tease, Don’t Satisfy


A common mistake you may not even realize you’re making?

Giving away too much in your headlines.

Your headlines should lure readers in like a literary temptress. They should catch readers’ attention and invoke their curiosity, not give a solution.

Give a solution in your headline and readers feel no need to go any further — they’re bored by the very thought of your post.

When this happens, not only do you lose but your readers lose as well, as they trade the richness of your post’s advice for the quick fix offered by the headline.

Example:

Let’s say you blog about personal finance and you write the headline below:

How to Save for Retirement by Creating a Monthly Budget

Sadly, readers will see this and think they’ve got all the advice they need — if they want to save for retirement, they must create a monthly budget. No need to read more.

On the other hand, a possible revision could be:

How to Save for Retirement When You’re Living Paycheck to Paycheck

For anyone living paycheck to paycheck, this headline would pique their curiosity. Nothing is given away, it speaks to an audience with a very specific problem, and it promises a solution they’d love to get their hands on.

Headline Rule #5. Honor the Headline Commandment


When it comes to headlines, there is only one commandment you can never break:

“Thou shalt not deceive.”

This may seem obvious, but writers inadvertently do it all the time. How?

They over-promise.

Big no-no. The content of your post must fully deliver on exactly what the headline promises.

If the post only delivers part of the solution, readers will feel misled and lose their trust in you.

Let’s never do that to them, yes?

Examples:

Let’s say you write a post called:

How to Live a Happy and Peaceful Life

But then the post only talks about following your dreams, which is really only one aspect of living a happy and peaceful life. Even though you didn’t intentionally deceive them, readers will feel shortchanged.

Another example — perhaps you write a post called:

5 Killer Ways to Attract New Clients to Your Coaching Business

But then the fifth way contains no useful advice and instead leads to a sales page to get the solution … no bueno.

Headline Rule #6. Trim the Fat


Want to overwhelm readers right from the start?

Fill your headline with weak and flabby words.

What are weak and flabby words? Empty, unnecessary words that add no real value. Instead, they create clunky phrasing and leave readers scratching their heads in confusion.

The mistake many bloggers make is writing headlines the way they speak. While that’s okay when you write the post (to a certain extent), when you write headlines that way it waters them down.

You want your headlines to be as ruthlessly concise and powerful as possible. So chop out weak words and throw in power words (if appropriate).

Examples:

Let’s say you draft the following headline:

How to Find It In Your Heart to Forgive Someone Even if They’ve Hurt You Really Badly

There are just so many words! We can cut them down as follows:

How to Forgive Someone Who Hurt You Badly

We can then add some power to it:

How to Forgive a Soul-Crushing Betrayal

Much better.

Another Example:

Here’s a mouthful:

How to Stop Being Overly Doubtful of Yourself So You Can Finally Begin to Pursue Your Wildest Dreams

My head is spinning. This can be cut down to:

How to Stop Doubting Yourself and Pursue Your Wildest Dreams

We could even make it more tangible and powerful:

How to End Paralyzing Doubts and Conquer Your Wildest Dreams

Nice and trim, but packs a punch.

Headline Rule #7. Don’t Be a Smarty-Pants


Your headline should make sense to all readers no matter where they’re coming from or in what context they’re approaching your post.

They shouldn’t have to guess what the benefit is. After all, you’re supposed to be reading their minds, not the other way around.

So you’ll want to avoid using metaphors (unless their meaning is painfully obvious), jargon, rhymes, made-up terms, or anything that tries to be overly clever or complicated when drafting your headlines.

Examples:

Where to begin with this one:

How to Be Happy Without Acting Sappy

A headline like this tries to be too clever — readers don’t give two hoots about not acting sappy, obviously. Don’t prioritize cute tactics like rhyming over delivering clear benefits in your headlines.

How to Raise a Child That Is the Apple of Your Eye

A headline like this is also trying to be too clever. “Apple of Your Eye” is a common metaphor readers are likely familiar with, but there’s no concrete benefit being offered here. A headline must always contain a strong benefit, not a cute phrase.

How to Follow the Path of Glory to Your Success

No clue what this means … and I just wrote it. If there isn’t a singular and clear interpretation of what the headline’s benefit is, it’s trying too hard. So save the metaphors for the actual post where they will (hopefully) make more sense.

How to Stop Treating Love Like a Captive Animal

Perhaps you effectively explain in the post how people treat love like a captive animal, and it may make for a great analogy, but readers scanning headlines will have no clue why they should stop to read this, and so they likely won’t.

Headline Rule #8. Rock Your Style


The more consistent you are with your audience, the more trust they’ll feel for you.

If you generally keep your headlines pretty simple and then suddenly write one jam-packed with power words, your readers will feel confused.

The more you write, the more of a style you’ll develop. Once you determine what that style is, use it consistently (or make slow and gradual changes to it if necessary) so your audience learns and trusts your brand.

Example:

If most of your headlines read like this:

  • How to Live With Courage
  • How to Overcome Social Anxiety
  • How to Confidently Embrace Uncertainty

Then you might not want to suddenly write a headline that reads:

  • How to Brazenly Squash the Agonizing Anxiety That Is Plaguing Your Life

Your readers will think your blog got hacked!

How to Write a Headline: Bonus Tip


When writing a headline, try crafting 5–10 different versions of the same headline.

The more you play with the words, the better you will get at creating clear, concise and curiosity-invoking headlines that readers cannot resist.

Editor’s Note:

I’d be remiss if I didn’t discuss a question we hear often:

“How long/short should my headline be?”

Ever notice how some headlines in SERPs (search engine results pages) are truncated?

truncated headline

It’s based on your headline’s width in pixels, but as a general rule: right round 60 characters Google will cut off your headline.

Since a truncated headline can result in fewer people clicking your link in SERPs, it’s a common SEO practice to keep your headlines 60 characters or less.

Of course, things are never that easy.

In a recent study, Brian Dean of Backlinko found that longer (14-17 words) headlines generated more shares on social media than shorter headlines.

(76.7% more social shares, to be exact.)

As with all things, your mileage may vary.


Step #2. Write an Introduction That Grabs and Seduces

You’ve lured readers in with your headline. Now you’ve got to keep them.

No easy task, my friend.

Readers are fickle. Known to take a quick glance and then vanish from your online sanctuary, lickety-split!

You must fight to keep them there, and the way you craft your introduction plays a huge role in their browsing commitment.

Follow these rules to craft an introduction that captivates your readers:

Introduction Rule #1. Slip into Their Shoes


A common mistake that reeks of amateur blogging?

Trying to sound too academic in your blog openings.

You know, those posts that start like this:

“Research has proven that 92% of people fail to achieve their goals because they are unable to create and stick to habits that support those goals …”

Don’t get me wrong — as a lawyer, I value solid research. But in the blogging context, this approach bores readers. If you want to captivate instead of bore, you must make readers feel like you’re reading their minds.

A powerful way to achieve this?

Empathy.

Step into their shoes and write from their perspective. Show them you understand exactly what they’re going through.

After all, you likely struggled with the very topic you’re writing about and learned how to overcome it. We teach what we most wanted to learn, right?

So show readers that you “get it.” You’re not some corporate slog, you’re in it with them, fighting the good fight and sharing the tools that brought you to the other side.

Example:

This introduction is a masterclass in empathy:

Do you feel that?

That little tugging sensation on your heart?

You’re not sure what, but something is pulling you to change. Not in a confess-your-sins-oh-ye-sinners way, but to shift directions, to embrace your calling, to finally do what you were put here to do:

Write.

You feel the ideas inside you. You sense them straining to escape. You know your job is to set them free, firing them like a cannon into a world in desperate need of them.

But you’re afraid.

You’re afraid of quitting your job and living without a safety net. You’re afraid of the concerned, disapproving looks your friends will give you when you tell them you’re giving it all up to write for a living. You’re afraid of not having enough money for food, of the power being cut off, of watching your family shivering and hungry, all because of your “selfishness”.

And most of all?

You’re afraid you’re wrong about yourself.

As writers, we all share the deep longing to embrace our calling and express our ideas, but we also share the fears that so often sabotage those longings — the fear that we don’t have what it takes, that we’ll crash and burn, and that our dreams are just that — dreams.

In his introduction, Jon addresses all those longings and fears and immediately makes you feel like he gets you so intimately, it’s almost creepy.

Creepy, but effective.

Note: You don’t need to open like this in every post. There are certainly other approaches, like telling a powerful story. But if you’re working on mastering your craft and getting the most impact for time invested, an empathetic opening is an approach you’ll want to use frequently.

Introduction Rule #2. Get into Character


If you want to captivate readers, you must trigger their emotions.

So as you sit down to write, think of the feelings you want them to experience:

Fear, anger, sadness, hope, joy, disgust, shame, comfort, love, courage, and so on.

Then get into character and feel them yourself as you write, and your words will read with undeniable authenticity.

When Lin-Manuel Miranda wrote the heartbreaking lyrics in Hamilton that have left tears on the faces of millions, it was his eyes that first shed tears as he put his pen to paper.

So play with your emotions. Map out the emotional journey you’re taking readers on, and infuse those feelings into your writing. Feel what you want your audience to feel and your words will exude those emotions.

This tip applies to your whole post, but in no place is triggering your audience’s emotions more important than your introduction.

You feel me? 🙂

Example:

I once wrote an emotional post about my two little girls which addressed how delicate their emotions are, as well as my own vulnerabilities and my longing to give them the patience, presence and love they deserve.

Here’s a portion of it:

I told my three-year old daughter as we stood outside the car in her school parking lot, the rain pouring down on us as she sobbed breathlessly in my arms.

She didn’t want to go in the car. She just wanted me to stand there, holding her. And I didn’t want to rush her, or tell her to stop crying.

“I’ll hold you for as long as it takes.”

I felt that longing intensely and definitely shed some tears as I wrote the introduction. The feedback I got from readers was that they felt the same intensity, and even cried as well.

When we write, our feelings seep into our words.

Introduction Rule #3. Lure Readers Down the Page


Want readers to commit to your post?

Accelerate their experience. Lure them down the page.

The faster they get pulled down, the more committed they’ll feel.

Too many bumps in the road early on, and off track they go, never to return.

Here are three copywriting tips to use in your intros to lure readers down the page:

#1. Open With a Short Sentence or Question

Kind of like how I opened this section. 🙂

This is how all of Smart Blogger’s posts open, and for good reason. It’s a copywriting technique proven to pull readers in.

Start a post with a long clunky paragraph and they’ll feel exhausted just looking at it.

#2. Take a Knife to Your Words

Slash as many words as possible.

If the first draft of your introduction is 200 words, try cutting it down to 100. The more you practice this, the more efficient your writing becomes.

And when you write efficiently, your words have power. That power will grab your readers.

#3. Set the Rhythm

All writing has a pace and rhythm.

You want your introduction’s pace and beat to be somewhat quick. You can slow things down later.

How do you achieve this?

  • Use short sentences. Even sentence fragments (totally okay).
  • Make your paragraphs no more than one to three sentences long.
  • Use delayed transitions to weave sentences together.
  • Make each sentence and paragraph lure readers into the one that follows.
  • Read the post out loud to check the flow. Are things moving forward smoothly or stalling?

The best writers, like the best music composers, take readers on a journey. Fast and slow, loud and soft, urgency and ease.

The more you pay attention to this, the more rhythm you’ll infuse into your words.

Example:

Shane Arthur sends readers’ eyes flying down the page by using crisp sentences and short paragraphs to create a fast rhythm:

You’re not stupid.

You know what writing is truly about.

It’s a never-ending battle for your readers’ attention.

Every sentence is a link in a taut chain that connects your headline to your conclusion.

And you are just one weak sentence away from losing your reader forever.

He then appropriately slows things down in the section that follows with longer sentences. A masterful composition!

Introduction Rule #4. Make Them Beg


Want readers begging for your solutions?

Add a little fear to your opening.

What are readers worried about? Do they know what will happen if they don’t solve the problem the post is addressing? What is the worst-case scenario?

Bring those fears to the surface. Expose them.

By doing so, not only will readers feel a camaraderie with you (because you understand their fears, so clearly you’ve tip-toed through the dark side yourself), but they’ll feel more eager than ever for the solution you present.

We all have fears. We think we need to hide them, but the more we give voice to them, the easier they are to set free.

Do that for your readers.

Example:

In his introduction, Glen Long brilliantly taps into the fear of failure all writers experience by addressing the dream of making a living as a writer and then quickly smothering that dream with the doubts that creep up at the mere thought of it:

So, who knows? Maybe the doubters are right. Maybe you are naive to think you could earn a living doing something you love, instead of something you just tolerate.

The fear of failure is painful, yes. But giving voice to it is validating and makes readers eager for the solutions that will set that fear free.

Introduction Rule #5. Hint at the Promised Land


Finally, as you wrap up your intro, hint at the promised land.

The place readers will get to when they master your methods. The destination your post promises to take them.

But whatever you do, do not give it all away. Just one sentence that says too much satisfies your readers enough to send them clicking away.

Why? Because readers bore easily. You must keep them on their toes. And the point of an introduction is not to give answers, it’s to set the stage for all the hearty advice your post will provide.

Example:

In the introduction to Meera Kothand’s post, she addressed a problem all new bloggers face: How do you get to know your audience when you don’t have one yet?

She goes on to talk about the big mistake many of them make (making assumptions) and why that’s ineffective. Then, she uses the simplest phrase to hint at a solution:

That kind of guessing is like throwing darts blindfolded and hoping you hit the bull’s eye.

Sometimes it works. Usually, it doesn’t.

Fortunately, there’s another way…

How could anyone not want to keep reading?

How to Write an Introduction: Bonus Tip


When writing an introduction, try drafting two completely different versions approached from different angles and triggering different emotions.

Doing so will highlight the techniques and emotions that work best for both your audience and the content of your post.

Editor’s Note:

A word of caution:

No matter how eloquent your words…

No matter how powerful your prose…

If your introduction doesn’t satisfy user intent, readers will click the “back” button and never return.

What’s user intent?

It’s the purpose behind the Google search.

If someone searches for “how to lose weight” in Google, they’re expecting search results that will help them lose weight.

If they click a headline that reads “7 Easy Tips For Losing Weight Fast”, and the post begins with an amusing Nicolas Cage anecdote, there’s a good chance they will leave — never getting to read the rest of the post, which is filled with weight loss wisdom.

And when they leave, what they’re essentially telling Google is this:

“At no point in your rambling, incoherent response were you even close to anything that could be considered a rational thought. Everyone in this room is now dumber for having listened to it. I award you no points, and may God have mercy on your soul.”

And Google will respond by ranking your post lower in its search results.


Step #3. Deliver Advice That’s Easy to Consume and Impossible to Ignore

Okay, you’re doing great.

You got readers to click on your headline, you lured them down the page with your intro, and now it’s time to deliver on all that you’ve promised.

If you want readers to love you and look forward to every post you write, you’ll over-deliver.

If you want them to take a quick look and vanish for good, you’ll under-deliver.

The choice is yours.

Use the guide below to deliver valuable and easy-to-consume advice:

Content Rule #1. Add Pitstops


Subheads — use them.

Why? Because readers are scanners.

They have no choice. There’s a behemoth amount of content at their fingertips, and not all of it is good.

And so they scan (as do you, I’m sure).

Subheads are your chance to prove to readers that your content holds value. To keep luring them back into your post, when their instinct is to leave.

Blogging is a battle, remember?

Keep these four tips in mind when drafting your subheads:

#1. Add a Subhead Every Few Paragraphs

Sprinkle subheads throughout your post.

Why? Because they gently guide readers along the route your post is heading, making their experience feel clear, easy and enjoyable.

And never forget, your blog posts are all about your readers’ experience.

If readers see too much text when they’re scanning without enough pit stops, they’ll feel overwhelmed. It’s like getting on a bus tour and being told there will be no bathroom breaks … oh, the anxiety!

Example:

Every single post on Smart Blogger.

Seriously.

That’s how important this is.

#2. Avoid the 3 Subhead Blunders That Make Readers Bounce

Subheads have the same function as headlines; they must make readers curious so they keep reading. So you should follow similar rules when drafting them and avoid the following common blunders:

  1. The Plain Label Subhead:  In case it bears repeating, never bore your readers. Labels are boring. Treat your subheads like mini-headlines and make sure they invoke curiosity.
  2. The Spoiler Subhead: Don’t give away too much in your subhead. If you do, readers will feel no compulsion to read the rest of your text.
  3. The Cryptic Subhead: Don’t try to be too clever. Readers don’t like to play guessing games. Adding curiosity should never come at the expense of clarity.

Example:

Let’s say you’re writing a post about the impact sleep has on anxiety levels and you include the following subheads:

  • The Importance of Sleep
  • Creating a Steady Sleeping Routine Will Reduce Anxiety
  • Refuse the Roast and Catch More Z’s

See how the first subhead is way too plain, the second gives too much away, and the third, well, it probably made no sense to you, right?

The subheads below would do a better job at grabbing readers:

  • The Easiest Way to Reduce Daily Anxiety
  • How to Beat Anxiety Without Resorting to Medication
  • The One Thing You Must Avoid to Sleep Better

#3. Compare Each Subhead to Your Main Headline

Each subhead should clearly deliver on the overall headline of your post.

Again, if you’re viewing subheads as pit stops, they must all lead to the ultimate destination — what was promised by your headline.

If the subheads get off track and move away from that destination, readers are left feeling lost and confused.

In that case, either the subheads need to change or the headline needs rethinking.

Example:

Say you’re writing a post called “How to Silence Your Nagging Inner Critic” and you include the following subheads:

  • Observe Your Thoughts
  • Prove Yourself Wrong
  • Ask Yourself This Powerful Question
  • Bravely Quit Your Day Job

The fourth subhead’s sudden twist in topic is jarring. It does not deliver on the overall headline, which had nothing to do with your day job.

Perhaps you intended all along for the post to be about not letting doubts stop you from following your dreams and quitting your day job, but readers scanning subheads will not understand that.

They will simply feel confused.

#4. Follow a Format

If you are listing various “ways,” “steps,” “methods,” “signs,” etc., to achieve what the headline of the post promises, keep the format consistent.

If you don’t, the post comes across as unpolished. Bloggers overlook this all the time, but it’s easy to fix once you’re aware of it.

If you separate your subheads from the post and list them back to back, you can see if any stray from the course.

Example:

Say your post is called “12 Ways to Cure Insomnia” and you have a subhead for each of the 12 ways. You’ll want those subheads to follow a consistent format.

Let’s say your first few subheads read as follows:

  1. Exercise Every Morning
  2. Avoid Caffeine Like the Plague
  3. Wake Up at the Same Time Everyday
  4. There is Nothing More Sleep-Inducing Than Nighttime Meditation

Something there feel a little off?

The first three subheads start with an action verb instructing readers what to do. They are also fairly consistent in length.

But then the fourth subhead suddenly changes the format and breaks the flow. It doesn’t start with a verb and it’s much longer than the others.

This inconsistency may seem fairly innocent, but it’s distracting to readers.

Content Rule #2. Unleash the Unexpected


Let’s face it, readers today are info-holics. We all are.

So tired old advice isn’t going to cut it. Your post must be unique, bold, and eye-opening.

My advice? List your main points and see if you can add a unique perspective, experience, or twist to them. Something readers aren’t expecting.

What belief systems have you learned to challenge? What do you know that most people don’t? How can you shed new light on an old problem? What methods do you use that others won’t know about?

You don’t want to go overboard just for the sake of adding shock value. Your advice must be authentic and truly helpful. But regurgitating old advice doesn’t challenge you as a writer, nor does it enlighten your audience.

So pour your readers a little espresso for their info-hangover by delivering the unexpected.

Example:

Countless articles have been written about blogging, but how many have called you out for being dumb or told you to replace your friends?!

Jon does just that by knocking you over the head with some hard truth bombs about what it takes to make it as a blogger.

Content Rule #3. Follow a Formula


Notice how this post follows a pretty consistent formula?

Each section is relatively similar in length. Every subhead follows a pattern. Each section ends with an example.

The more consistency you weave into your posts, the better the reader’s experience.

Let’s say you write a list post covering five steps to achieve something. If the first step is 500 words, the second and third steps are 100 words, the fourth step is 200 words and the fifth step is 400 words, it looks sloppy. As though you didn’t bother to edit it before hitting publish.

Your readers deserve the best, and minor details like this matter as they affect the fluidity of their experience.

Want to go even more pro? Look at the the beginning, middle and end of each section you write, and create a guiding formula. Perhaps you start each section with a bold statement or personal experience. Then you flesh out your advice in the middle. And then you end each section with a one-sentence call to action.

The more formulas you add to your posts, the easier they are to write and the more they look like polished works of art.

Example:

In his post on getting traffic from Twitter, Brian Honigman uses hashtags for each subhead, each section is consistent in length, and each includes a graphic.

Readers know exactly what to expect from each section, making for a fluid reading experience.

Content Rule #4. Be Ridiculously Generous


Many bloggers worry about giving away too much in their posts. After all, they want readers to sign up for their paid coaching calls or products.

So they hold back, barely skimming the surface of their advice.

Truthfully, if you’re not generous with your readers in your posts, they won’t get a good impression of your paid products.

Don’t hold back on your readers. Fully work through the problem with them. Give them complete solutions and powerful advice. Wow them with your generosity and they will stick around as loyal readers and customers.

Example:

Want to learn everything there is to know about affiliate marketing?

Holy smokes. At 10,000 words, that insanely generous post by Leanne Regalla is basically a textbook on the subject, and reader comments praise it as such. (Let’s all bookmark this one, yes?)

A post of this magnitude is quite an undertaking, but don’t let it scare you. You can also wow your audience with your generosity and thoughtfulness in a 1,000-word post.

Content Rule #5. Start and End Strong


Just as your introduction and conclusion should grab readers, you want the main body of your post to start and end strong as well.

Of course, every section should have valuable content, but if you’re offering five ways to achieve something, save your absolute best tips for the first and fifth ways. The first way will grab your readers’ attention, and the fifth way will leave them feeling fully satisfied.

On the other hand, if each tip successively decreases in value, readers will feel like your post is deflating. And their excitement will deflate with it.

Let’s leave readers feeling pumped when they finish your post.

Example:

Linda Formichelli gives ten crafty ways to write 1,000 words per hour.

While all ten ways are excellent, I’d argue that the first (about writing under the pressure of a full bladder) and last (about gambling with your reputation) are the most bold and attention-grabbing (bathroom break, anyone?).

Writing a Blog Post: Bonus Tip


Before writing the main sections of your post, flesh out an outline to nail your points down.

The clearer and more simplified your outline is, the more clarity and conviction your post will have.


Step #4. Close with a Motivational Bang

We’re almost at the finish line! It’s time to close your post with a bang.

This is where you rally behind your readers. Show them that you believe in them.

Make them believe they can achieve the goal promised by your headline (because after reading your generous advice, they certainly can).

Follow these rules when crafting your motivational conclusion:

Conclusion Rule #1. Give Your Readers a Pep Talk


Motivate your readers.

Show them how far they’ve come, what they’re capable of, and what life will look like once they’ve implemented your advice.

Give them the pep talk you longed for when you were struggling with the topic your post presents.

Empower them by raising your expectations of them. They can’t just read your post and pretend it never happened — they must take action. Immediately.

Make them see that no matter what they’ve experienced or how hard they’ve struggled, their time is now.

Example:

In this post’s conclusion, Jon uses all he’s had to overcome in life to show readers that they have no excuses: no matter hard things get, they can accomplish anything they set their minds to.

He encourages readers by letting them know that he believes in them and then he raises his expectations of them by telling them they need to get started … “right freaking now.”

By the time you’re done reading the conclusion, you feel like you can conquer just about anything!

Conclusion Rule #2. Avoid New Information


A common mistake many bloggers make?

Suddenly inserting new information or tips in their conclusions.

It’s like reaching the last ten minutes of a spellbinding movie. You’re on pins and needles waiting to see how it ends, and suddenly a new character is introduced. What the … ?!

It’s jarring. Don’t do that to your readers.

Example:

In his conclusion, Robert van Tongeren motivates you to repurpose old blog posts by comparing them to epic musical classics; if they  disappeared into obscurity simply because they’re old, we’d all be at a great loss.

Imagine if in the midst of such a conclusion, Robert quickly threw in one more way to repurpose content, or one small caveat to his post’s advice, or one more general tip to keep in mind?

It would throw the whole closing off and leave readers feeling ruffled instead of jamming to Bohemian Rhapsody.

How to Write a Conclusion: Bonus Tip


When writing your conclusion, put yourself back in the shoes of your readers.

What will their lives be like if they accomplish the advice in your post? How will they feel?

The more you can hone in on your readers’ point of view, the more you can motivate them to take action.

Editor’s Note:

Too many bloggers put too little thought into their closings.

That’s a shame.

Let’s face it…

Most people don’t read 100% of our posts. Heck, most people don’t even read half.

So how do we reward the precious few who read and absorbed the words we poured our heart and soul into?

With a closing we whipped together in 20 seconds.

Someone who makes it to the end of your post is primed.

They trust you. They like you. They want you to tell them what to do next.

So tell them.

Don’t waste this opportunity.


Step #5. Polish Your Post So It’s Smoother Than a Slip ‘n Slide

Phew! You’ve written your post. Next up?

Take a well-deserved break. Step away for a day or more so you can come back to it with fresh eyes.

Once you’re ready, it’s time to do some editing. I know, the mind reels that there’s more work to do!

But editing your post is essential. If your post doesn’t provide a smooth reading experience, your reader will lose attention and bail.

Use this checklist when you’re ready to edit your post:

  • Take a Knife to It. Slash all unnecessary words, sentences, paragraphs, stories, etc. Include only what is absolutely essential to convey your message. Nothing more.
  • Motivate, Don’t Lecture. Tweak any statements that hint of being the condescending professor. Make readers feel like you’re on their side and dedicated to their success (because you are).
  • Add Emotion. Infuse your writing with passion, energy, and enthusiasm. If you’re bored by your topic, readers will be too.
  • Make it Easy on the Eye. Break up any large paragraphs (2–5 sentences maximum is your goal) and run-on sentences.
  • Break it Down. Clarify overly complicated wording. If you can’t say it simply, don’t write it. You don’t want to confuse your readers.
  • Speak Their Language. Add examples or metaphors to make complex ideas feel more tangible and easier to digest.
  • Check Yourself. Remove any contradictory statements or repetitive ideas (trust me, they’re there).
  • Don’t Yo-Yo. Ensure each sentence, paragraph and section drives the post forward toward the destination promised by the headline (no side routes or backtracking).
  • Be Smooth. Make each sentence and paragraph flow seamlessly into the next. Each sentence should be completely dependent on the ones before and after it or the transitions will feel choppy.
  • Avoid Sharp Turns. Adjust any abrupt changes in topic. They’re jarring to readers.
  • Keep It Real. Don’t mimic styles that don’t come naturally to you. The more you write, the more you’ll find your authentic writing voice.
  • Add Highlights. Use bold and italics to add stress where appropriate (but do so sparingly).
  • Shoot Bullets. Use bullet points to group related ideas and make them more digestible.
  • Spark the Senses. Be specific and concrete (describe things readers can see, feel, hear, smell or taste). Avoid abstract statements.
  • Be Firm. Avoid words like “might,” “may,” “possibly” and “perhaps” when delivering your advice.
  • Respect Nature. Put things in their natural order (e.g., past to present, young to old, small to large, breakfast to dinner, etc.).
  • Be Consistent. Make sure all points in a list belong to the same category; a list of steps should only list steps, a list of things should only list things, etc. This might sound like common sense, but this rule gets broken often.
  • Don’t Be Lazy. Ensure all the necessary information is contained within the post itself. (External links should only provide supplemental information. A reader shouldn’t have to click a link to comprehend your post.)
  • Kill the Weak. Eliminate weak and flabby words. Replace weak verbs (e.g., “she went”) with more concrete, visceral verbs (“she walked”), replace passive voice (e.g., “he was pushing”) with active voice (e.g., “he pushed”) and replace weak adjectives (e.g., “good”) with strong adjectives (e.g., “wonderful”).
  • Feel the Beat. Be mindful of the pace and rhythm of each section. Speed things up or add some punch with crisp, short sentences. Slow things down with longer explanations. Good writing uses both.
  • Do the Obvious. Fix any spelling or grammar mistakes (check out tools like Grammarly and Hemingway App).
  • Be Honest. Give credit where due.
Want this 22-point checklist as a handy, printable PDF? Click herehttps://blogtraffic.lpages.co/leadbox-1498077769.js to download it for free.

How to Edit a Blog Post: Bonus Tip


A great way to self-edit your posts is to read them out loud.

Doing so will help you catch many of the issues listed above, particularly things like overly complicated wording, run-on sentences and choppy rhythm.


Win the Battle for Your Reader’s Attention

Blogging is a battle.

A war to get your ideas the attention they deserve.

Your enemy? The dizzying array of online distractions that devour your readers.

This battle is not for the faint of heart.

There are so many learning curves. Blogging platforms and plugins you’ll need to install. Social networks you’ll need to employ. Marketing techniques you’ll need to try.

But none of that stuff matters if you’re drowning your ideas in amateur writing. You might as well lay your sword down in defeat. Readers don’t have time for amateurs.

So before you venture any further down the blogging rabbit hole, you better make sure you know how to write a blog post like a pro.

Skip that step, and nothing can save you. Your battle is lost.

The good news is, writing effective blog posts is a skill you can learn. And it’s one you must learn.

You have powerful words and ideas that can transform readers’ lives. Those ideas are worth fighting for.

So when you’re ready to enter the arena, arm yourself with this ultimate guide and fight the good fight.

Your readers are counting on you.

About the Author: Liz Careathers, Esq. worked as an instructor in Jon’s guest blogging course for two years editing the posts of hundreds of students. She now writes to empower her readers at StrongSensitiveSouls.com while raising her two little girls. Download her free Checklist for Writing Blog Posts that Emotionally Engage Your Audience.

The post How to Write a Blog Post in 2019: The Ultimate Guide appeared first on Smart Blogger.

Source: https://smartblogger.com/how-to-write-a-blog-post/

Uncategorized

How to Promote Your Blog in 2019: 9 Creative Strategies

Whether your blog is brand new or already established, you can never have enough traffic.

Seriously…

I work at an SaaS company called Ahrefs, and even though the Ahrefs blog pulls in over 200k organic traffic every month, we still experiment with ways to promote our blog and bring in more traffic.

Because let’s face it:

It’s 2019. Simply sending an email blast to your subscriber list doesn’t cut it anymore.

But don’t fret.

If you’re stuck coming up with new ideas for how to promote your blog, here are 9 tried-and-tested tactics that have worked for us.

Let’s dig in.

#1. Work with Podcasts

Let’s start things off with the buzzword of the year: podcasts.

Thanks to their flexibility (you can listen to them while you’re at work or when you’re on the go), they’re the most popular form of audio content.

They’re also widely available on services like iTunes, Google Play, and Spotify.

Some quick facts:

Ahrefs has had great success with sponsoring podcasts (paid advertising) as well as guesting on them — that is, sending a member of our team to be interviewed on a show.

Here’s an actual comment from a new customer and blog reader of ours:

moc podcast testimonial

For sponsoring podcasts, think of this tactic as a type of influencer marketing.

Your job is to sell your blog to the podcast host and the podcast host’s job is, in turn, to sell your blog to their audience.

How to Promote Your Blog by Sponsoring Podcasts


If you have the budget, sponsoring podcasts is a great way to promote your blog. Here’s how you do it:

Step #1. Do Your Research

Create a list of podcasts whose audiences are a good match for your blog. If you have no idea where to start, here’s a tip:

Try using a specialized podcast search engine like Listen Notes. Browse the shows and pick your favorites.

listen notes

Step #2. Make Contact

Once you’ve created a list of targets, you’ll need to contact the podcasts and inquire about sponsorship details.

What are their pricing packages? What dates do they have available? Are there any gotchas?

Prices can range from $50 to $5,000 and beyond per episode, so work within your particular budget.

Step #3. Iron Out the Details

This includes your ad copy, delivery, and any other deliverables like your blog’s logo and elevator pitch.

In my experience, organic reads do much better than “scripted ads.”

The goal is to get the podcast host to sound like a fan and regular reader of your blog.

Step #4. Wait for Your Ad to Air

If anything is off, be sure to let the podcast know as soon as possible!

How to Promote Your Blog with Podcast Interviews


If you’re strapped for cash (or simply don’t want to do podcast advertising), another approach is to appear as a guest on podcasts.

This is usually free — unless you’re approaching extremely-popular podcasts, which tend to charge a one-time appearance fee.

The catch is you’ll need some kind of credibility to your name. In other words, you’ll need to convince the podcast host that you’re someone their audience would love to listen to.

The process for this is similar to the one detailed above:

Step #1. Create a Target List

Use Listen Notes or a similar tool to create a list of podcast targets.

Step #2. Check if They Accept Interviews

Often, podcasts will explicitly state on their websites whether or not they accept interview requests.

And if they don’t accept interview requests? Ask anyway.

Send in your pitch and convince them you have lots of value to add.

Step #3. Follow the Host’s Lead

Every podcast will have their own process. Some may want to do pre-interviews, some may want to work on a rough content online with you, and some may want to just “wing it.”

Whatever the process, remember to be courteous and respectful — you’re a guest, after all.

Just don’t forget to mention your blog!

Editor’s Note:

Appearing on podcasts is one of our favorite promotion strategies here at Smart Blogger — as evidenced by our appearances on EOFire, James Altucher, Duct Tape Marketing, the Write Podcast, and Loz James’ Content Champion.

Just make sure you’re prepared:

  • Show up early to the interview so the host has time to do a sound check.
  • Don’t use your phone or your laptop’s built-in microphone; instead, invest in an external microphone. Quality and price points vary, but you can get a simple microphone that plugs into your computer’s headphone jack for the price of a medium pizza.
  • Use headphones to cut down on echoes.
  • Turn off all notifications and, if you can, shut your door to minimize background noise.

#2. Republishing on Medium

Sure, you can publish tons of absolutely amazing posts on your own blog.

But if you never extend your reach, whether it’s by growing your list of email subscribers or boosting your number of social media followers, your audience will be limited.

So what do you do if you don’t have time to create promotional content and extend your reach?

Try this:

Republish your existing posts on blogging platforms like Medium.

Your content will be seen by a whole new audience — some of which will then visit your blog and discover all the great content you have to offer.

For example, look at this blog post I published on the Ahrefs blog last December:

podcast advertising ahrefs blog

It got 463 shares and 43 comments — very decent engagement considering the fact that the topic likely didn’t appeal to our blog’s core audience (people interested in search engine optimization).

In a bid to push the post out to a wider audience, we republished it on Medium. It turned out to be a fantastic decision.

Here are the stats as of March this year:

medium stats

That’s 13.6k views in total, with 22% of readers actually finishing the whole post.

Plus, the Medium publication of this post averages a steady trickle of 10-30 readers every day.

Note: For the SEO-conscious among us, Medium uses canonical tags when you use their republishing tool. So no worries about duplicate content issues.

How to Republish on Medium


Medium has made the process of importing and republishing content super simple. Here’s how you do it:

Step #1. Choose a Post to Republish

Ideally, pick one of your top performers (since it’s already proved it’s popular).

You can use a tool like Ahrefs’ Top Content report in Site Explorer to see which of your posts have the most shares on social media.

ahrefs top content

Since they’ve proven themselves on social media, these posts are the most likely to resonate with audiences beyond your blog’s existing one.

Editor’s Note:

Though they aren’t nearly as detailed, there are a few free tools to track social media shares if you aren’t an Ahrefs customer.

As an example, SharedCount.com lets you copy and paste URLs of individual posts; however, they only show counts for Facebook and Pinterest:

002 social media counts

Step #2. Import Your Post Into Medium

Enter the URL of your post into the Medium import tool and hit “Import”.

medium import

Step #3. Publish Your Post on Medium

Follow Medium’s guidelines to format and polish your post, then click “Publish”.

medium new story

That’s all there is to it!

#3. Smart Social Sharing

I know, I know.

It’s 2019, and promoting your blog posts on social media is by no means a new strategy.

BUT — there’s more to social media promotion than pasting a link and clicking a “Tweet” button.

Here’s an example of the success we’ve seen from smart sharing on the Ahrefs Twitter account:

Ahrefs on Twitter

Pretty impressive, right?

Here’s another example:

Ahrefs on Twitter

These tweets received amazing engagement, but we actually spent very little time creating them.

We achieved this ROI by working smarter, not harder.

How to Promote Your Blog Using Social Media (Smartly)


Here’s our process:

Step #1. Brainstorm Ideas and Organize Them

The great thing about social media content is it’s all fleeting. Even if an idea is a flop, it’s easy to turn the page and try the next idea.

But to make the most of these (admittedly fleeting) opportunities, you need two things:

  1. A large list of ideas;
  2. A method for grouping similar ideas into categories.

To brainstorm ideas, get a pen and paper (or launch Google Docs, Microsoft Word, etc.) and jot down things you would like to try.

Get as creative as you want.

Think memes would be popular with your audience? Write it down. Believe infographics or inspirational quotes could be successful? Write them down. Believe posts or tweets on Topic X or Topic Y could receive high engagement?

(You get the idea.)

By listing all of your ideas, you’ll then be able to group them into categories. This will help you track which categories are successful and which are not.

Step #2. Craft and Publish (and Monitor) Your Content

You can use social media management tools like Buffer and MeetEdgar to schedule your content and keep it running automatically.

Once your social media posts begin making their way into the wild, you’ll be able to track their progress.

Do some receive more comments, while others receive more shares and retweets? Are some more popular in the mornings, while others receive more engagement during the evenings?

All data, both good and bad, will help you in the next step.

Step #3. Review the Results

After an appropriate amount of time has gone by, hold a review.

Drop the categories that didn’t perform well. Keep the ones with potential and refine them.

You want to focus on the categories your audience likes and tweak them.

Do they like emojis, or do they gravitate towards a more “serious” tone? Do they like infographics, or long chunks of copy with statistics thrown in?

And so on.

From here, keep repeating steps 1-3 until you’ve locked down the type of content your audience loves.

And once you’ve figured out what they love, keep giving it to them.

Step #4. Advertising (Optional)

If you want to try advertising, the above process will save you some serious money.

Pick your top organic performers from Step #3 and put money into promoting them.

Since they’ve already proven themselves to be popular, this is a safe and effective way to buy ads to promote your blog (without wasting time and money on losers).

#4. Create Roundup Posts

The perks of this strategy pretty much sell themselves.

Here’s what happens when you publish a good roundup post:

  • First off, it’s easy to write since most of the content is created for you;
  • You make new and powerful connections within your industry;
  • Thanks to those connections, you gain access to new audiences;
  • Your post naturally gains backlinks and social shares.

So… what’s a roundup post, anyway?

Here’s an example:

what is seo ahrefs blog

Essentially, a roundup post features a compilation of answers to a single question, ideally by established experts in the field.

A great roundup post adds immense value to readers since they offer a range of expert opinions in one place.

Plus, they tend to bring in lots of traffic since the experts featured in them will often share the post with their own audiences.

What’s not to love?

How to Create Roundup Posts


Here are the basics of roundup posts so you can create your own:

Step #1. Craft Your Question

Don’t take this step lightly.

If you ask too much of the experts you’ll be polling, most won’t have time to participate (even if they want to). And if you ask a question they’ve heard (and answered) a million times, most won’t be interested.

Your question needs to be clear, succinct, and something that will appeal both to your readers and the experts you’ll be asking to participate.

Step #2. Create a List of Influencers

Once you’ve crafted your question, it’s time to create your influencer wish list. These are the influencers (“experts”) you’ll be asking to participate in your roundup post.

Since not everyone will respond to you, reach out to significantly more experts than you need.

For example, if you need 20 people for your roundup post, reach out to 40 experts (or more).

Remember:

A roundup post is only as good as the people you feature. While it takes exponentially more time and effort to get a response from a more recognized name in your industry, it’s likely worth it.

With that said, don’t expect the Michael Jordans of your industry to respond to your outreach — try to find people with a reasonable level of influence who aren’t complete titans.

Step #3. Reach Out to the Experts

You can use specialized tools like BuzzStream or Mailshake to streamline the entire outreach process by making it easier to hunt down email addresses, batch send messages, and conduct follow-ups.

buzzstream outreach list

Quick tips for the message you send:

  1. Keep it short;
  2. Keep it genuine.

Step #4. Follow Up (But Only Once)

There’s a chance your first email will slip past the expert you’re trying to reach. After all, they’re very busy and likely receive dozens (or hundreds) of emails every single day.

This is why sending a follow-up email is helpful:

one quick SEO question for a new Ahrefs blog post rebekah bek ahrefs com Ahrefs Pte Ltd Mail

However, please don’t follow-up more than once — any more than that and you’re just being a nuisance.

Step #5. Compile Your Responses

At this point, you’ll have a bunch of answers ready to sift through. Now all you need to do is turn them into a cohesive post.

Try to find trends in the responses and sort them into sections.

Next, add your own introduction to each section, as well as your opinion on why certain trends occurred.

This is how you put your stamp on the roundup post and make it your own.

Step #6. Publish Your Post (And Tell the Experts)

Once your post is published, it’s time to let everyone know about it.

Email everyone who responded to your outreach emails (whether they ultimately contributed to your post or not) and thank them for their time. Include a link to your post, and be sure to send them well-wishes.

You can also ask them (politely) to share your post with their audience, but this is often implied.

Editor’s Note:

Want to let influencers know your post has been published and promote the post at the same time? In addition to emailing them, tag the influencers on Twitter too.

outreach tweet

#5. Advocate In-Person

While all blogs are digital in nature, your promotional efforts aren’t limited to the digital world alone.

It might be a step (or ten!) outside your comfort zone, but try this:

Approach a local event in your niche and pitch yourself as a speaker.

It doesn’t matter where you are in the world or how big the event is — it could even be a small meet-up session.

The idea is to reach out to new people and give the work you do a huge visibility boost.

inperson

How to Promote Your Blog by Speaking at Events


If you’re interested in this advanced promotional tactic, here’s how to get started:

Step #1. Shortlist a Few Events or Meet-Ups You’d Like to Attend

If you’re not sure where to start, look around on Reddit, Facebook groups, or Slack groups and join some communities in your industry.

Chances are good people are organizing and promoting events in these communities.

Make a list of potential targets, underline your favorites, and move on to the next step.

Step #2. Pitch Yourself to Event Organizers

When pitching yourself, propose some topics that you’d be comfortable speaking about and explain how your content will add value to their audience.

Hopefully it goes without saying, but you should know these topics very well.

Note: If you have no experience with public speaking, it’s a good idea to start small. Save the conference keynote speeches for later.

Step #3. Craft Your Presentation

Try to deliver as much value as you can and position your blog as a great resource. This is also a good time to promote your social media accounts, which are ideally already geared towards driving traffic to your blog.

Just be sure not to make it all about you. Your job is to teach, to impart your know-how to others.

And when you’re able to do this well, promoting your blog will happen organically.

Step #4. Speak

Show up to the event, deliver your speech, meet lots of new people, and enjoy converting some new readers!

Editor’s Note:

To improve your chances of landing speaking engagements, make sure you:

  • Have a website (aka your business card);
  • Create a 2-3 minute demo video (aka your movie trailer);
  • Acquire a few testimonials (from people willing to vouch for you).

There’s a lot more to it than we can unpack here, so be sure to check out Grant Baldwin’s post How to Get Speaking Engagements. In fact, browse his entire website, The Speaker Lab. It’s chock-full of helpful information.

#6. Integrate Your Blog with Your Product

Most businesses have blogs that are completely disconnected from their main product.

If you blog for a brand or business, why not align your messaging and integrate your blog posts directly into your UI (for software products) or in your product descriptions and previews (for e-commerce)?

This lets you direct traffic over to your blog and gives your customers a more seamless experience.

How to Fuse Your Blog and Product


For software products, one way to notify people of your newest blog posts is to include a (preferably unobtrusive) in-app notification.

Here’s what it looks like when using Ahrefs:

Site Explorer

Click the bell icon and we display a simple drop-down menu listing all our newest content.

in app blog post

So simple, but so effective.

If you have an e-commerce website and your blog posts are educational in nature, you can promote them directly on your homepage.

Beardbrand does this beautifully:

beardbrand blog integration

Another way to do this is by scattering in individual links and excerpts of your blog posts wherever they’re relevant. This is how Mr Porter does it:

mr porter blog integration

Time to get creative!

Editor’s Note:

Here’s one more tip that’s missed by a surprising number of business websites…

Include a prominent link to your blog in your website’s navigation menu.

Ahrefs, MeetEdgar, Elegant Themes (affiliate link), and many other smart businesses feature their blogs in their navigation, which helps drive traffic to them.

Here’s how Quuu (affiliate link) does it:

quuu

In other words:

If people have to hunt to find your blog ON YOUR OWN WEBSITE, you’re doing it wrong.Click To Tweet

#7. Collaborate with Other Blogs

Creating content in collaboration with another blog means you’re able to tap into each other’s audiences and can promote yourself to a whole new set of blog readers.

You can even split the work!

Here’s a post that Ahrefs did with Buffer, a social media management tool:

buffer ahrefs

How to Join Forces With Another Blog


Fair warning:

Collaborating with blogs significantly larger than yours probably isn’t in the cards. However, collaborating with a site similar in size is definitely doable.

Here’s how to get started:

Step #1. Find Opportunities in Your Niche

Look for opportunities to work with blogs within the same niche as yours.

Start by approaching bloggers you have an existing relationship with and ask if they’d like to collaborate. You should leave cold pitching as a last resort.

If you have no idea which blogs to approach, Ahrefs offers a nifty trick:

In Content Explorer, enter a relevant keyword phrase in your niche.

Set the “published” filter to “Last 12 months” and the “Language” filter to “English”. Next, highlight the “one link per domain” option.

Finally, you’ll want to set one more filter: DR (“domain rating”).

The higher this number, the more authoritative the website; however, the more authoritative the website the harder it will be for you to get the blogger’s attention.

In the screenshot below, we set the DR to 40:

content explorer blogs

This will pull a list of active blogs in your niche.

From here, just sift through the possibilities and pick the ones you’d like to approach.

Step #2. Make Your Pitch

The process is pretty similar to advocating in-person: you need to make your best pitch.

Focus on explaining why you want to work with that particular blogger, as well as how collaboration will benefit them.

Feel free to suggest a couple of topics you feel would work well.

Step #3. Create

Creation time!

Finalize your content with the blogger you’re working with and remember to stay prompt and gracious throughout.

This is not the time to get pushy or rude and make an enemy out of a would-be ally.

Step #4. Publish and Promote

Promote the post to your newsletter and social media accounts. Make sure to tag and give credit to the other blogger too.

#8. Repurpose Content Into Other Formats to Reach New Audiences

You’ve spent all this time and effort to create amazing content in the form of blog posts.

Why not get more out of the same piece of content?

Since your customers hang out in multiple places online and have their own preferences when it comes to content formats, you should try to reach audiences beyond blog readers.

And you do that by repurposing your content.

give your old content a paint job

How to Repurpose Your Content


Some examples:

  • Turn your blog posts into SlideShare presentations;
  • Take a small section of your blog post and reimagine it as an infographic;
  • Convert your blog post into a YouTube video.

Or, do it in reverse.

We published a YouTube tutorial on WordPress SEO. It has over 20,000 views and 70 comments — not too shabby.

We decided to turn it into a blog post. Here’s how it performed:

wordpress seo blog post

By re-creating our video in written form, we were able to reach an entirely new audience on an entirely different platform.

And the best part?

We didn’t have to come up with fresh content for the post. We took what we already had and created something new with it.

#9. Monitor Online Conversations for Opportunities to Promote Yourself

People talk about all sorts of things on the Internet, including your niche.

If you monitor these conversations, you’ll get lots of chances to slide into the discussion, add value, and (subtly) promote your blog.

Here’s a pretty meta example of this tactic in action.

I once mentioned Talkwalker alerts in a blog post I wrote, and an employee commented on the post to provide the link:

talkwalker alerts

How to Monitor Conversations for Promotion Opportunities


Tracking online conversations is surprisingly easy. Here’s how you do it:

Step #1. Set up Your Alert

You can use a free tool like Google Alerts, or services like Talkwalker Alerts and Ahrefs Alerts.

For Ahrefs, go to Alerts, Mentions, +New Alert, and enter your keyword you’d like to track.

ahrefs alerts

What these tools do is send you an email every time a keyword is mentioned on the web.

From there, you can simply follow the link in the email to find out where you’ve been mentioned.

Step #2. Carefully Monitor Your Mentions

Whether your mention comes in a blog article or a forum discussion, look for suitable areas where you can add value.

For example, if you’re a food blogger and you receive an alert for a discussion of a restaurant, it’s your time to shine by talking about your own experience.

However, a word of warning:

It’s extremely important not to shoehorn yourself into conversations.

If you’re clearly only there to advertise your own blog, people will catch on pretty quickly.

So, be sure to link to your own blog strategically, and only after you’d added value to the discussion.

Editor’s Note:

You can also track mentions using Twitter’s advanced search.

For example, let’s say I wanted to find every English-speaking tweet in 2018 that mentioned Jon Morrow by name:

twitter advanced search

Twitter’s advanced search results would return a veritable smorgasbord of tweets:

twitter advanced search results

Cool, right?

Use this feature to find keywords and mentions that matter to you, roll up your sleeves, and then get to work. The applications are nearly limitless.

Over to You

If you sometimes find yourself lying in bed at night wondering, “how do I increase my blog traffic?”, I feel your pain.

I did my best to stay away from the more common methods of blog promotion, so hopefully you found something new to try.

Of course, not all of the tactics we discussed will be suitable for, or will work for, your blog and your particular niche.

You’ll need to experiment and find what works for you.

When it comes down to it, marketing is always about experimenting — experimenting, failing, and going at it again and again until you succeed.

Now, go forth and get that traffic!

About the Author: Rebekah does marketing and writing for Ahrefs. She doesn’t sit still for long, so catch up with her on Twitter.

The post How to Promote Your Blog in 2019: 9 Creative Strategies appeared first on Smart Blogger.

Source: https://smartblogger.com/how-to-promote-your-blog/

Uncategorized

How to Install WordPress in 5 Minutes or Less (2019)

Looking for a tutorial showing you how to install WordPress, but keep finding resources that tackle every method except the one you need?

We’ve got your back.

In this post, we break down every conceivable way there is to install WordPress.

You’ll learn how to install WordPress using cPanel, Softaculous, MOJO, Fantastico, and QuickInstall; locally on both Windows and Mac; manually using FTP; and we’ll break down popular hosting providers like GoDaddy, Bluehost, and HostGator.

You’ll also learn how to install WordPress Multisite, how to install WordPress in different languages, and more.

Just click the appropriate link in our Table of Contents to jump to the section you need.

Ready?

Let’s go.


How to Install WordPress on cPanel (Softaculous, MOJO, Fantastico, and QuickInstall)

So, you decided to start a blog.

Awesome. Now it’s time to roll up your sleeves and get to work installing WordPress.

Thankfully, many of the popular WordPress hosts offer some form of simplified (or even automatic) installation.

If you’re using a “shared” WordPress hosting plan, there’s a good chance your host will use cPanel.

Editor’s Note: cPanel is an online control panel many web hosts use to simplify the whole “how to host a website” thing for users. Go here to learn more about it.

Let’s walk through the cPanel process…

Step #1. Find Out How to Access Your Host’s cPanel


Unfortunately, the way you get to cPanel is not standardized across the web. Different hosts access it differently.

So, before you can do anything, you need to find out how to access your host’s cPanel.

The easiest method is to find the emails your hosting provider sent you when you signed up for your account. Among other valuable bits of information, the URL to your cPanel will be in one of those initial emails.

But if you can’t find the right email, don’t worry.

Just Google the name of your web host and “cPanel login”.

That should do the trick.

Step #2. Get to Know cPanel


The main cPanel dashboard can be a little intimidating.

Relax.

You don’t have to understand all cPanel has to offer. We’re here to do one thing — learn how to install WordPress.

For that, let’s look for the cPanel installer tools, which are usually located near the bottom of the page.

Your host might be using any of the following installers: Softaculous, Fantastico, QuickInstall, or MOJO Marketplace.

We’re going to focus on Softaculous since it’s the most popular.

But don’t worry if your host uses a different installer.

While the specific interfaces might be a bit different, the idea behind every installer is the same.

Plus, they all ask you for the same set of data and inputs.

Step #3. How to Install WordPress Using Softaculous


To begin, look for the Softaculous section in cPanel.

Softaculous section in cPanel

Click on the WordPress logo. The installer tool will open:

Click on the WordPress logo

Click on the Install Now button to begin the installation process.

Softaculous needs only a handful of details from you. Here are the fields you should pay special attention to:

  • “Choose the version you want to install” — Always go for the most-recent version available.
  • “Choose Protocol” — “https://” is the option preferred by Google.
  • “Choose Domain” — Leave unchanged if you have just one domain assigned to your server; if you have more than one domain, select the desired one for this installation.
  • “In Directory” — Leave empty if you want to install WordPress in the main directory of your domain name (which most people do).
  • “Select Plugin(s)” — Optional (but as a general rule: the fewer plugins, the better).

Here’s what the form looks like:

Softaculous WordPress Form

Click Install to proceed.

When the process finishes, Softaculous will show you a final confirmation screen along with links to your WordPress dashboard.

And that’s it!

You’ve installed WordPress using cPanel.

Note: The WordPress dashboard of your newly-installed site should be available at yoursite.com/wp-admin/.


How to Install WordPress on Localhost (Or, How to Install WordPress Locally)

The instructions for how to install WordPress locally depends on whether you’re using a PC (Windows) or a Mac.

We’ll go over both methods.

First up: Windows.

(If you’re on a Mac, click here to jump ahead.)

How to Install WordPress on Windows


WordPress is a great tool for local web development.

Here’s how you install WordPress locally on Windows:

Step #1. Get XAMPP

XAMPP is a local web server for your computer. It’s an all-in-one package with everything you will need to run software (such as WordPress) locally.

What About WAMP?

You might have heard of a similar tool called WAMP.

Under the hood, WAMP and XAMPP do the same thing. However, in my opinion, WAMP isn’t as reliable as XAMPP.

For this reason and others, we’ll focus on XAMPP in this tutorial.

Download XAMPP

From the XAMPP website, click on the download button for Windows and save the XAMPP package to your desktop.

Launch the XAMPP installer and follow the prompts on the screen.

First, select the individual components you want to have installed. To be safe, you can choose all of them:

Select XAMPP components you want to install

Next, select the installation folder for XAMPP.

Note: Avoid installing XAMPP in Program Files. The read/write restrictions of Windows might prevent it from working correctly. Installing in C:\xampp is a safer bet.
Select installation folder for XAMPP

XAMPP will take a minute or two to install.

When it’s finished, you’ll see this confirmation screen:

XAMPP confirmation screen

When you click on Finish, you’ll see the main XAMPP config panel.

In it, click on the two Start buttons next to Apache and MySQL.

Like so:

XAMPP configuration panel

You should see the two labels change to green:

XAMPP configuration panel - 2

When you see green, your local server is working!

Step #2. Create a Blank Database for WordPress

From the control panel of XAMPP, click on the Admin button in the MySQL row:

XAMPP configuration panel - 3

This will launch a tool called PHPMyAdmin, which is an open-source database management tool.

Launch phpmyadmin

Go into Databases (from the top menu).

Go into phpmyadmin database

Enter a name for your new WordPress database (something simple) and click the Create button:

WordPress phpmyadmin database

You should see your new blank database in the sidebar:

New blank WordPress database in phpmyadmin

You can now exit PHPMyAdmin.

Step #3. Download WordPress

Go to WordPress.org and download the most recent version of the software.

Don’t worry. It’s free:

Download most recent WP version

Next:

  • Save the file to your desktop or downloads folder. Extract it.
  • Go to the folder where you installed XAMPP (C:\xampp) and find the htdocs subfolder.
  • Create a new subfolder inside htdocs. This is where your site is going to live. For the purpose of this demo, I’ll name the folder mynewsite.
Note: The name of this folder will also become part of the local address of the site. With mynewsite being the folder name, the address of the site is going to be localhost/mynewsite.

Take the contents of the WordPress archive and move them to this new subfolder (“mynewsite” or whatever you named yours).

It should look like this:

Move WordPress archive contents into new htdocs folder

Step #4. Install WordPress Locally on Windows

Open your web browser and navigate to localhost/mynewsite.

What you’ll see is the on-screen WordPress Installation Wizard.

The first step is choosing your language:

Choose your WordPress language

The next screen is an info card to get you up to speed with what’s going to happen. Click on Let’s go! once you’ve read it.

The next step is a crucial one in the installation.

This is where you get to enter the details of your WordPress connection to the database.

Here are my settings based on everything I’ve set in the previous steps so far:

WordPress database connection details

Important parts:

  • Database Name — This is the name you set in PHPMyAdmin when creating the database in Step #2.
  • Username — Set to root.
  • Password — Leave blank.
  • Database Host — Set to localhost.
  • Table Prefix — Leave as is.

The next step is where you get to set the name of your site and the details of your main admin account:

Set WordPress site name and details
Note: With the exception of username, you’ll be able to easily change these later in your WordPress dashboard.

Click on Install WordPress to finalize everything.

And that’s it. You’ve installed WordPress locally on Windows.

How to Install WordPress on Mac


While installing WordPress locally on Mac isn’t the usual “get app from App Store” experience we’re used to, it can still be done with relative ease.

Here’s how to install WordPress on Mac:

Step #1. Get MAMP

MAMP is a local web server that works quite well on Mac.

(It’s also easier to install than some of its alternatives.).

Install WP on MAMP

From the MAMP website, go to the downloads section and choose the option for macOS:

Download MAMP

Save the package to your computer.

Launch the MAMP installer and proceed through the on-screen wizard.

Launch the MAMP installer

When the installation finishes, open MAMP from Mac’s Launchpad.

In the config panel, click on the main Start Servers button.

Click on the main Start Serves button

Congrats! Your local server is working.

Step #2. Create a Blank Database for WordPress

As soon as you start your server in MAMP, you will be taken to the server’s homepage.

Usually, it’s “http://localhost:8888/MAMP/” (without the quotes).

From there, click on PHPMYADMIN under TOOLS:

Click on phpmyadmin under MAMP Tools

As mentioned earlier in the post, PHPMyAdmin is a handy, open-source database management tool.

We use it to create a new database for WordPress.

Create a new database for WP

Go into Databases (from the top menu):

Go into Databases

Enter a name for your new WordPress database (something simple) and click on Create.

Like so:

Enter database name

You should see your new blank database in the sidebar.

Blank database in sidebar

You can now exit PHPMyAdmin.

Step #3. Download WordPress

Go to WordPress.org and download the most recent version of the software.

Download most recent WP version

Next:

  • Save the archive to your Mac and extract it.
  • Go to the default web folder of your server. That’s usually in Applications/MAMP/htdocs. You can check the location of your default web folder by going into MAMP settings and choosing the Web Server tab:
     

    In MAMP settings, select Web Server tab
  • Create a new subfolder. This is where your site is going to live. For the purpose of this demo, I’ll name my subfolder mynewsite.
Note: The name of this folder will also be part of the local address of the site. With mynewsite being the folder name, the address of the site is going to be localhost:8888/mynewsite.

Take the contents of the WordPress archive and move them to the new folder you created. It should look like this:

Move WP archive contents into new folder

Step #4. Install WordPress Locally on Mac

Open your web browser and go to localhost:8888/mynewsite.

What you’ll see is the on-screen WordPress installation wizard. The first step is choosing your language:

Choose your WordPress language

The next screen is an info card to get you up to speed with what’s going to happen. Click Let’s go! once you’ve read it.

In the next step, you will enter the details of your WordPress connection to the database.

Here are my settings based on everything I’ve set in the previous steps:

WP database connection details

Important parts:

  • Database Name — This is the name you set in PHPMyAdmin when creating the database in Step #2
  • Username — Set to root.
  • Password — Set to root.
  • Database Host — Set to localhost.
  • Table Prefix — Leave as is.

The next step is where you get to set the name of your site and the details of your main admin account:

Set WordPress site name and details
Note: With the exception of username, you’ll be able to easily change these later in your WordPress dashboard.

Click on Install WordPress to finalize everything.

And that’s it. You’ve installed WordPress locally on a Mac


How to Install WordPress via FTP (Or, How to Install WordPress Manually)

Installing WordPress via FTP takes only minutes, but you do need to have a couple of things ready beforehand.

Chiefly, you need to have access to a web server — aka, a web hosting account.

Editor’s Note: Two WordPress hosting options we recommend to our Smart Blogger students are SiteGround (affiliate link) and WP Engine (affiliate link). Both are great options.

Start by going to your host of choice and purchasing one of the available web hosting plans. If you already have a web host, you’re ahead of the game!

Next:

Step #1. Download WordPress


Go to WordPress.org and download the latest version of WordPress.

Download most recent WP version

Save the package to your computer and extract its contents.

Step #2. Upload WordPress Files to Your Server


The next step involves connecting to your web server via FTP and uploading your just-downloaded WordPress files.

You’re going to need to use a third-party FTP tool to do that.

FileZilla is a popular one. We’ll use it for the purposes of this demo.

Now, in order to connect to your server, you’ll need your connection details.

This information should have been provided via email when you first signed up for your hosting account. But if you can’t find it, no worries. You can find your FTP information inside your host’s cPanel.

Go to the FTP Accounts section (under FILES):

cPanel FTP accounts

You’ll find your FTP accounts there. Or, alternatively, you can create your FTP account if one doesn’t already exist.

Next to your FTP account, there’s a link labeled Configure FTP Client.

Click on it:

Configure FTP client

This will reveal a new section.

In it, click on the FTP Configuration File button under FileZilla:

Filezilla FTP configuration

You can open that file with FileZilla and set up your connection details immediately.

With that done, the only thing left to do is upload your WordPress files to the server.

Depending on your hosting setup, you might need to upload WordPress to a specific directory.

However, for most users the directory will be called public_html or public_www.

If in doubt, verify with your web host.

Step #3. Create a New Database for WordPress in cPanel


WordPress, just like any other modern CMS, cannot work without a database.

The database is where all your posts, pages, comments, and other site content are kept.

To create a new database, go back to cPanel, scroll down to the DATABASES section, and click on MySQL Database Wizard:

MySQL database wizard

From there, you’ll be guided through the steps to create a new database.

First, pick a name for your database:

Create a database

Next, create a new user account that WordPress will use to access the database.

Create database users
Note: Be sure to jot down the username and the password. You’ll need them in the next step.

Lastly, assign sufficient access rights to the new user account.

It’s best to do that by simply selecting ALL PRIVILEGES, like so:

Add User to database

Your database setup is now complete!

Step #4. Install WordPress Through the Online Installer


This is the last step on your journey to getting WordPress installed via FTP.

Simply fire up your browser and navigate to your site’s URL.

You’ll see the main page of the WordPress installer.

First, choose the language of your site:

Choose your WordPress language

The next step is a crucial one, and it’s where you’ll need to provide your database details.

(Hopefully you jotted those details down earlier!)

WP database connection details

Here’s a breakdown for each:

  • Database Name — The name of your database (from the previous step).
  • Username — Your chosen username (from the previous step).
  • Password — Your chosen password (from the previous step).
  • Database Host — In most cases, set this to localhost. If your hosting setup requires a different value here, they can provide this info.
  • Table Prefix — You can safely ignore this field and leave as is.

The next step is where you get to set the name of your site and the details of your main admin account:

Set WordPress site name and details
Note: With the exception of username, you’ll be able to easily change these later in your WordPress dashboard.

Click on Install WordPress to finalize everything.

And that’s it! You’ve successfully installed WordPress manually using FTP.


How to Install WordPress Multisite

WordPress Multisite is an interesting feature built into WordPress.

Simply speaking, with WordPress Multisite, you can launch multiple WordPress websites, all working on the same WordPress install.

This is great for businesses and organizations that need multiple websites, but want to keep the cost of managing them low.

WordPress Multisite is also a great choice for universities where it’s very common for individual courses or teachers to have their own sites.

Here’s how to set up and install WordPress Multisite:

Step #1. Install WordPress Locally, via cPanel, or via FTP


To begin your journey with WordPress Multisite, you first need to install WordPress using any of the methods described earlier in this guide.

Go here to install WordPress using Softaculous, MOJO, Fantastico, QuickInstall, or any other installer tool offered by your host’s cPanel.

Go here to install WordPress locally on Windows or here to install WordPress locally on a Mac.

Finally, go here to install WordPress using FTP.

Once you’ve installed WordPress, you’re ready for the next step.

Step #2. Enable WordPress Multisite


Connect to your server via FTP (explained previously in this guide), and download the wp-config.php file from your main WordPress directory.

Open the file in Notepad (or similar software) and add the following line at the bottom:

define (‘WP_ALLOW_MULTISITE’, true);

Save the file and re-upload it to your main WordPress directory via FTP. You’ll want to overwrite the original file.

Step #3. Set up Your WordPress Multisite Network


At this stage, WordPress is ready to let you configure your network of sites. Here’s how:

First, go to your plugins and deactivate all of them.

Deactivate all plugins

Next, go to Tools > Network Setup. This is where you create your network of WordPress sites.

Create network of WP sites

Click on the Install button to begin.

On the next screen, WordPress will give you specific instructions for finalizing the setup.

File edits in WP directory

This will involve editing two files in your WordPress directory (similarly to how we did it a minute ago with wp-config.php).

Example setup:

Step #4. Create your WordPress Multisite Sites


Once you log back into WordPress, you’ll see an updated version of the admin interface with one new section in the top left corner:

Multisites in WP dashboard

This menu is where you can switch between your WordPress sites (and where you can add new sites to the network).

Each website is independent, can feature different content, different user accounts, different themes, different plugins, and so on.

Congrats! You’ve successfully set up WordPress Multisite.

(Feel free to re-activate all your plugins!)


How to Install WordPress in Your Language

Did you know WordPress has been translated into 113 (and counting) languages?

It’s true. You can install WordPress in everything from Afrikaans (South Africa) to 香港中文版 (Simplified Chinese).

In short:

You can install WordPress in your language, no matter what that language might be.

Here’s how to do it:

#1. Download WordPress in Your Language


Go to WordPress.org.

Since WordPress is quite predictive and helpful with international users, based on your location, you’ll see a note encouraging you to download WordPress in your language.

Here’s an example:

Install WP in your language

What the above box says is:

“WordPress is also available in Polish.”

When you click on the language — in this example, “Polski” — you’ll get redirected to a new, localized WordPress website.

Once there, download the WordPress package and save the ZIP file to your desktop and extract its contents.

#2. Install WordPress via FTP


Next, follow the same instructions we discussed earlier in this guide.

Click here to jump to Upload WordPress Files to Your Server.

Bonus Tip: Installing Language Files from the Admin Dashboard


If you’ve already installed WordPress in one language, but you’d like to use a different language, don’t fret.

WordPress makes switching your language a breeze.

In your Dashboard, go to Settings > General > Site Language.

Then simply choose the language you’d like to use.

And that’s it! You’re done.


The following section covers how to install WordPress on 12 popular hosting providers. Click on a link below to jump to your host:

How to Install WordPress on SiteGround


SiteGround (affiliate link) offers a cool wizard tool to get your WordPress installed in minutes. There’s no need to deal with any coding, settings, or uploading things a server.

Here’s a video showing you the process:

But, if you prefer written instructions, here are the steps:

When you log into your SiteGround user panel for the first time, you’ll be greeted by a message asking if you’d like to have a new website set up for you:

Start a Siteground website

Click on the option labeled “Start a new website” and select WordPress as your platform.

SiteGround will also create a new admin account for you. All you need to do is provide the login details:

Choose your WP login details

That’s all there is to it.

How to Install WordPress on Bluehost


When you sign up for a Bluehost WordPress Hosting plan, the latest version of WordPress is installed automatically for you. All you have to do is configure it.

Here are the steps:

If you’d like to set up additional WordPress sites, it’s easy to do so via the Bluehost dashboard.

Go to My Sites, and then click on Create a Site.

Create site on BlueHost

Enter your site details and proceed through the individual screens.

First, you’ll need to pick a name for your WordPress installation:

Name WordPress installation

You will then enter the domain name and directory, plus any optional plugins you might want:

Choose a domain for your WP installation

Finally, set your admin user login and password.

How to Install WordPress on GoDaddy


GoDaddy uses cPanel for installing WordPress on their hosting plans.

Here’s their official video walking you through the entire (simple) process:

And if you need to add another WordPress site, that’s easy too.

Log into your GoDaddy user panel, go to Managed WordPress > Manage All. Click Add Site.

Add a GoDaddy site

From this point on, GoDaddy will take you by the hand and do most of the work for you. All you’ll need to do is enter a name for your site and your desired login credentials for the admin user.

When the installation finishes, GoDaddy will show you a WordPress Setup Wizard to help you customize your site:

Create GoDaddy WP site

You can click No thanks or Continue.

How to Install WordPress on WP Engine


WP Engine (affiliate link) is one of the original “managed” WordPress hosting platforms. They handle all the technical heavy lifting for you, so you can focus on what’s important for your website’s success.

What this means in practice is WP Engine will install WordPress for you when you create an account. You don’t have to lift a finger.

You access the site from your user panel:

Set up site in WP Engine

If you want to add additional sites to your WP Engine setup, it’s pretty easy. Here’s a video tutorial showing you how:

If you prefer written instructions, here’s WP Engine’s official guide for adding or deleting WordPress installs.

How to Install WordPress on Flywheel


Like WP Engine, Flywheel is a managed WordPress hosting platform. They take care of the technical aspects — including installing WordPress — for you. All you have to do is provide a few pieces of info.

Here’s a video walking you through the process:

If you would like to create additional sites, from your user profile click the Create a New Site button:

Create site at Flywheel

Next, provide all the necessary details such as site name, admin user login, password, and your preferred payment method.

Enter WP site details at Flywheel

Once you’ve completed the form, your site will become visible in your user profile.

That’s all there is to it.

Here’s Flywheel’s official guide for adding new sites if you need more information.

How to Install WordPress on Kinsta


Kinsta is a newcomer to the managed WordPress hosting market. Like WP Engine and Flywheel, Kinsta installs WordPress for you when you create your account.

If you’d like to add additional WordPress sites to your Kinsta plan, follow the steps in this video:

If you prefer written instructions, here’s Kinsta’s official guide for adding WordPress sites.

How to Install WordPress on HostGator


Like many shared WordPress hosts, HostGator gives you access to cPanel. With it, you can easily install WordPress using the steps in the video below:

Can’t play the video? No worries.

HostGator also offers an extensive how-to article for installing WordPress on their platform.

How to Install WordPress on DreamHost


For each of their WordPress hosting plans, DreamHost provides WordPress pre-installed. All the work is done for you.

If you’d like to add additional WordPress sites, here’s a video showing you how it’s done:

Prefer written instructions?

Here is Dreamhost’s how-to article for using their handy 1-Click WordPress Install.

How to Install WordPress on A2Hosting


A2Hosting offers both shared and managed WordPress hosting.

For shared hosting, they offer 1-Click WordPress installation using Softaculous. Here’s a video to walk you through the steps:

If you opt for one of their managed hosting plans, WordPress will come pre-installed with your A2Hosting account.

If you’d like to add more WordPress installs to your account, here’s the official A2Hosting video to show you how:

How to Install WordPress on InMotion Hosting


Like its managed-hosting competitors, InMotion Hosting  provides pre-installed WordPress on your hosting account from the get-go. This means that you don’t need to install WordPress on your own.

If you’d like to install WordPress on an add-on domain, InMotion offers this handy tutorial video:

How to Install WordPress on iPage


Just like other “managed” WordPress hosting companies, iPage provides WordPress pre-installed with your account. (You also get a set of pre-installed WordPress themes and plugins.)

Here’s a helpful video showing you how to configure your iPage WordPress site:

If you need to install some additional WordPress sites on iPage, click here to read their guide.

How to Install WordPress on Hostinger


Hostinger offers a quick-and-easy auto installer for WordPress.

Here’s their official video showing you how it’s done:

If you prefer written directions, here’s Hostinger’s tutorial for installing WordPress (using various methods).


Frequently Asked Questions

Before we wrap things up, let’s go over a few common, related questions we often hear:

Do I Need to Install WordPress?


Answer: It depends.

If you use a “managed” web host like WP Engine, installing WordPress is taken care of for you. You don’t have to do anything (beyond filling in a few pieces of information).

However, if you’re using a “shared” hosting plan, you’ll need to install WordPress.

The good news is that most web hosts have made the process easy. A few clicks and you’re finished.

Editor’s Note: This is all assuming, of course, you want a WordPress site. WordPress is awesome, but it’s not the only game in town — there are many blogging platforms out there.

Does WordPress Cost Money?


No, the WordPress software is 100% free. Anyone can go to WordPress.org and download it for free at any time.

The typical costs for running a WordPress website come from other factors, such as purchasing a domain name and choosing a hosting provider.

Does WordPress Include Hosting? (Or, Does WordPress Host Your Site?)


If you’re using WordPress.com, the answer is yes.

WordPress.com is a free, hosted version of the WordPress software offered by the company. (You can upgrade to various paid plans if you need more features.)

However, if you’re using the self-hosted version of the software available for free at WordPress.org, the answer is no. You’ll need a hosting provider.

Which Hosting is Best for WordPress?


WordPress.org officially recommends Bluehost, DreamHost, and SiteGround.

At Smart Blogger, we recommend SiteGround (affiliate link) and WP Engine (affiliate link).

Since SiteGround is on both lists, it’s safe to say it’s a solid option.

How to Install WordPress Themes?


Your WordPress installation will come with several free themes (designs), but there are thousands of additional themes — both free and premium — you can add.

Here’s a quick guide for how to install WordPress themes from inside your WordPress dashboard.

How to Install WordPress Plugins?


Though you have to be careful not to go overboard with them, WordPress plugins are one of the software’s best features — they allow you to add all sorts of functionality to your WordPress site that’s not available out of the box.

SiteGround has published a helpful tutorial for how to install WordPress plugins if you would like step-by-step instructions.

How to Install Facebook Pixel on WordPress?


If you’re interested in running Facebook Ads (either now or in the future), you need to install a Facebook Pixel on your WordPress site.

What’s a Facebook Pixel? It’s a piece of tracking code you add to your website that collects data whenever someone visits your site or takes a specific action.

Here’s a video explaining it in more detail (including how to install it):

If you prefer written instructions, here is Facebook’s help article on Facebook Pixel, which includes steps for creating and installing them.


It’s Time to Install WordPress

Installing WordPress can be overwhelming — especially if you’ve never done it before.

Hopefully, this in-depth guide has been able to point you in the right direction. Use it, bookmark it, and feel free to share it with a friend.

And if there’s an installation method we missed, tweet us or let us know about it in the comments. We’ll happily add it.

About the Author: Karol K. (@carlosinho) is a WordPress figure-outer, blogger, and published author of WordPress Complete. His work has been featured all over the web on sites like: Ahrefs.com, Smashing Magazine, Adobe.com, CodeinWP.com, and others.

The post How to Install WordPress in 5 Minutes or Less (2019) appeared first on Smart Blogger.

Source: https://smartblogger.com/how-to-install-wordpress/

Uncategorized

Ghostwriting 101: How to Get Paid Big Bucks As a Ghostwriter

You want to make money as a writer, right?

You’ve told everyone on Facebook (including your weird aunt) that you’re available to write. You’ve been writing guest post after guest post to showcase your talent and get your name out there. Maybe you’ve even landed a few jobs already. (Good for you!)

But then a potential client emails you with the question, “Do you offer ghostwriting services?”

And you’re stumped.

Maybe you’ve heard of ghostwriting. Maybe you have some idea what a ghostwriter is. Or maybe you wonder if it involves ouija boards in some way.

You don’t want to look like an idiot by emailing back to say, “Err… what do you mean?”

That sounds like a good way to send your potential client running for the hills.

But don’t worry — I’m about to tell you everything you need to know about ghostwriting, starting with…


What IS Ghostwriting?

You might already have some hazy ideas about ghostwriting. When I first heard of ghostwriting, I thought it was just used for celebrity memoirs.

It turns out memoirs are just the tip of the iceberg. Ghostwriting is everywhere — from independent authors using Kindle Direct Publishing to popular bloggers using WordPress.

So what is it?

When you ghostwrite, you let someone else put their name on your work. That is, you don’t get any credit — at all.

Typically, the person who commissions the work will own the copyright, which also means they can modify or republish the work in any way they see fit.

So why would someone hire a ghostwriter? Are they too lazy to write their own stuff?

Not necessarily. People hire ghostwriters for many different reasons, but the most common ones are:

  • Their business has grown so much that they no longer have time to write (all) their own material.
  • They have a wealth of expertise or an exciting story to tell, but they don’t enjoy writing or they’re not very good at it.

It’s nothing new, either: ghostwriting has been around, in one form or another, for centuries.

To give you a better idea what being a ghostwriter may involve, my own ghostwriting has included:

  • Taking a rough draft, editing it heavily, and expanding on it where necessary.
  • Taking a blogger’s rough notes and transcribing them.
  • Putting together short, functional blog posts (e.g., announcing a new podcast).
  • Taking an assigned topic and very brief outline, then writing a post.
  • Writing a post based on a title and nothing more.
  • Coming up with ideas, getting them approved, then ghostwriting the posts (though this is rare!).

As you can see, ghostwriting has a spectrum from something akin to an editing relationship to writing a piece from scratch.

And it’s growing in popularity.

The demand for ghostwriters is so high it’s now taught in schools — California State University, Long Beach offers a Ghostwriting Professional Designation Program led by Claudia Suzanne.

Of course, I’ve only ghostwritten for blogs.

Authors like Roz Morris have written whole books as ghostwriters, which is a far more involved process that includes extensive interviews with the client.

But Why Would You Let Someone Else Take Credit for YOUR Writing?

Assuming you want to build up your own brand as a writer, why would you want to be a ghostwriter?

After all, you won’t get any of the credit. Your name won’t appear anywhere on the piece, and you probably can’t tell anyone you wrote it.

So why do so many writers ghostwrite, and why do so many love it?

Well, because there are major benefits:

Benefit #1: Being a Ghostwriter Pays Exceptionally Well


One huge reason to be a ghostwriter is money. Ghostwriting tends to pay better than regular freelancing.

After all, having your name attached to your words is valuable for you as a writer. When you have a byline, you can use that piece of work to showcase your talent, build your reputation, and potentially attract new clients.

So it’s appropriate (and standard practice) to increase your fee to compensate for the loss of these advantages.

There’s no exact rule of thumb for how much extra you should charge for ghostwriting over regular freelancing. Personally, I tend to increase my fee by about 15%–20%.

On top of that, once you’ve established a ghostwriting relationship with someone, it often results in ongoing work for you. Most people want their writing to be consistent, so it makes sense to stick with the same writer.

In other words, you have consistent work at a higher rate than usual. That’s quite a plus, isn’t it?

Benefit #2: Ghostwriting Lets You Develop Closer Relationships with Big Names in Your Field


As a ghostwriter, you’ll normally work quite closely with your client. You may be privy to their rough notes or mind maps, or you might interview them on the phone or in person.

Chances are, you’re also focusing your ghostwriting on a particular area of expertise (especially if you’re writing for a blog).

This means you’ve got a brilliant opportunity to get to know and be affiliated with someone well-established in your field.

You’ll find that you get valuable insights into the “behind the scenes” of a top blog, or you get a clearer idea of how a big-name author works and thinks.

This may be eye-opening! It could give you some ideas for how best to move forward with your own business when you start your own blog.

And as you build up closer relationships, or even friendships, with your client, they might share your other work on social media, bringing you a lot of extra traffic. (Several of the people I ghostwrite for have supported me in that way.)

If you ever need a favor or need some advice, there’s a good chance they’ll be very happy to help.

So much of blogging success depends on getting a helping hand from other bloggers — particularly those with a large audience and a great reputation in their field.

Ghostwriting brings you into close contact with exactly those people.

The Counterpoint: Why You Might NOT Want to Be a Ghostwriter

There are a couple of big concerns that writers have about ghostwriting:

“But surely that’s not ethical?”

“But why should they benefit from my hard work?”

“But what about building my platform?”

These are real, valid concerns. And for you, they may be deal-breakers.

So let’s dig into them.

Objection #1: “When You’re a Ghostwriter, You’re Helping Someone Fool Their Readers — That’s Unethical”


When you’re a ghostwriter for someone, they pass your words off as their own.

Which begs the question…

Is ghostwriting ethical?

The authors who hire ghostwriters certainly think it is! But not all writers or readers agree. Many feel that some types of ghostwriting are more ethical than others.

For instance, think about these two scenarios, which are on opposite ends of the ghostwriting spectrum:

  1. A big-name blogger hires a ghostwriter to write an e-book on their behalf. The blogger talks to the ghostwriter for an hour and provides a detailed outline. Once the e-book is complete, the big-name blogger reads it, edits it, and puts his or her name on it.
  2. A big-name blogger hires a ghostwriter to write an e-book on their behalf. They give the ghostwriter free rein to come up with the topic and outline, and they don’t supply any help. When it’s done, the blogger puts his or her name on it without giving it a second look.

Personally, as a reader, I’d feel comfortable with situation #1. The thoughts in the e-book belong to the blogger, but the ghostwriter has helped shape them.

Situation #2, however, seems a lot thornier. As a reader, I’d feel cheated by that.

I’m buying the e-book because I want the blogger’s expertise — not that of a ghostwriter I don’t know.

If you’re thinking of ghostwriting, you have to make up your own mind about what is — and isn’t — ethical. Where would you personally draw the line as a ghostwriter, if at all?

For more thoughts on the rights and wrongs of ghostwriting, check out Patty Podnar’s post Is Ghostwriting Ethical?

Also, Amanda Montell’s Your Favorite Influencers Aren’t Writing Their Own Content—These Women Are is quite eye-opening about some of the less ethical practices in the ghostwriting world.

Objection #2: “It’s Too Painful Watching Someone Else Get Praised for YOUR Work”


It may sound silly, but not getting recognition for your writing can be quite painful — unbearable to some.

I have to admit that, as a writer, it can sometimes sting a little to see a blogger receive lots of lovely praise for a post that I wrote every word of. And I’m not alone; many writers find themselves missing the attention and craving the recognition.

It’s no fun watching someone bask in glory that should be yours.

But think of it this way: All that praise is a sign you did a great job. You can be proud of that, and you can feel confident you’ll get hired again!

Also, as ghostwriter Roz Morris points out in an interview with whitefox, it’s not just ghostwriters who go unnoticed by readers:

There are many unsung heroes in the creative industries, and ghostwriters are only one of them. Editors can also make a huge difference to a book and are rarely credited.

So, if you can’t stand watching someone else take the praise, that’s okay. Many writers feel that way. But maybe we should also keep things in perspective.

Objection #3: “Ghostwriting Keeps You from Building Your Platform”


Even if you’re okay with someone else getting the praise, you may still oppose the idea of letting them take credit.

Some writers feel that, to become a successful freelance writer, you need to take credit for every powerful word you write and create an impressive body of work with your name on it. They believe that ghostwriting is essentially a waste of time.

After all, when you’ve got a bio (or at least your name) on every blog post you write, each of those posts helps raise your profile. You’ll be bringing in new readers and potentially new clients through your work — without any additional marketing.

This is essentially the argument that Demian Farnworth puts forward in The Brutally Honest Truth About Ghostwriting:

The first thing every writer should ask is this: What do you want to accomplish as a writer? Is building a personal and visible platform important to you? Will it help you in the long run? If you have to ghostwrite to make ends meet, fine. But beat a hasty path out of the business as soon as possible. It’s your turn to run the show.

I certainly think it’s worth putting some serious thought into how best to make ghostwriting work for you. It might be that you want to solely focus on your own platform (heck, you might even hire ghostwriters of your own, some day down the line!).

But there’s no shame in taking ghostwriting jobs to generate a steady income while you build your platform. It doesn’t have to be one or the other. You can do both at the same time.

Ghostwriting takes some focus away, but that doesn’t mean it’s not worth doing.

By the way: We’ve created a handy visual summarizing this post that you can share and embed on your own site. Check out the image below (click to see a larger view):

Ghostwriting 101: The Must-Read Ghostwriter Primer for 2019

Embed This Infographic On Your Site

<!—– Copy and Paste This Code Into Your Post —-><a href=”https://smartblogger.com/ghostwriting/”><img src=”https://smartblogger.com/wp-content/uploads/2017/08/ghostwriting-101-primer.png&#8221; alt=”Ghostwriting 101: The Must-Read Ghostwriter Primer for 2019″ width=”700 px” class=”noa3lazy”/></a><br><a href=”https://smartblogger.com/ghostwriting/”>Ghostwriting 101: The Must-Read Ghostwriter Primer for 2019 from SmartBlogger.com</a>


How to Become a Ghostwriter

If you’ve been nodding your head while reading this post, you’re probably wondering…

“Okay, but how do I become a ghostwriter?”

Answer:

The same way you become a freelance writer.

Here are the keys:

#1. Build Your Content Creation Skills


If you want to be a ghostwriter, you have to learn how to create quality content. What’s this mean? It means:

  • Mastering content frameworks
  • Learning how to write solid headlines
  • Knowing how to support your points with examples
  • Keeping your readers emotionally engaged

…and more.

Nothing will impact your ability to earn real, tangible income as a ghostwriter more than your ability to create amazing content.

So, if you don’t know how, learn.

Further Reading: Check out our resource How to Write a Blog Post – The Ultimate Guide. Once you’ve mastered the basics, read How to Create Content People Will Still Remember in 5 Years’ Time.

#2. Learn the Ins and Outs of SEO


If you can create content that will rank on Google, clients will pay you.

Happily.

Heck, they’ll throw money at you.

So how can you help your content rank on Google? By learning all you can about Search Engine Optimization (SEO) and applying what you learn to the content you create.

Further Reading: Don’t know SEO? Brian Dean has a great guide that will help you learn the basics of SEO fast.

#3. Build an Awesome Portfolio of Sample Content


Ideally, you’ll have three levels of portfolios:

  1. A portfolio that shows you know how to write,
  2. a portfolio that shows you’re a subject matter expert of a given topic, and
  3. a portfolio that shows documented success for clients.

But when you’re just starting out, you need to focus on the first level:

A portfolio that proves you know how to create a decent piece of content.

If you don’t already have your own blog or website, create an account on a free blogging platform like Medium.

Two or three sample posts are enough, and you can get started right away.

#4. Find Your First Paying Client


In the early days, finding those first few clients will be difficult.

Even with solid content creation skills, SEO know-how, and a great portfolio proving you know how to write, finding paying clients without word of mouth and referrals won’t be easy.

Here’s what you’ll need to do:

  1. Keep checking job agency postings.
  2. Pitch to software company blogs like HubSpot, Sumo, and Ahrefs.
  3. Do as much self-promotion as you can, including mentioning your ghostwriting service in the byline of your blog or Medium posts.

It’ll be a slow process at first, but once you get those first few clients you’ll be set. Do a great job, make your clients happy, and referrals will happen.

Further Reading: Bookmark this giant list of content marketing agencies. It’ll come in handy.

Ghostwriting 101: A Quick Recap

We’ve covered a lot, so let’s review:

What Is Ghostwriting?
Ghostwriting is when a writer (“ghostwriter”) is hired to create a piece of content for a company or individual, who will then publish the work as their own.
Do Ghostwriters Get Credit for Their Work?
Ghostwriters are paid to let someone else put their name on their work — they do not receive any credit, and they usually cannot tell anyone they wrote it.
Why Do People Hire Ghostwriters?
There are numerous reasons why someone would want to hire a ghostwriter, but two big reasons are time restraints and a lack of desire (or ability).
 
Regardless of their reason, parties who choose to hire ghostwriters do so because it’s advantageous. (They’re getting something out of it, in other words!)
What Are the Benefits of Being a Ghostwriter?
There are two huge benefits to ghostwriting:

  1. Exceptional pay, and
  2. business relationships.

Because they miss out on auxiliary perks like bylines and having their name attached to the content, ghostwriters are usually well compensated.
 
Also, ghostwriting brings ghostwriters into close contact with bloggers, authors, and influencers with large audiences. These connections can sometimes be worth more than the commission itself.

How Much Do Ghostwriters Make?
It varies from writer to writer, but an increased fee of 15% or more from their standard freelancing rate is reasonable when ghostwriting.
What Are the Typical Objections to Ghostwriting?
Those who throw shade at ghostwriting typically do so for one of three reasons:

  1. Ethical concerns,
  2. not wanting to see someone else get credit for their work, and
  3. the worry ghostwriting will keep the writer from building up his or her own platform.

We’ve covered each of these objections in detail. Whether any of them are deal-breakers is up to you.

How to Become a Ghostwriter
The process is very similar to the one for becoming a regular freelance writer:

  1. Build Your Content Creation Skills
  2. Learn the Ins and Outs of SEO
  3. Build an Awesome Portfolio of Sample Content
  4. Find Your First Paying Client

In short:

  1. Learn how to create awesome content,
  2. learn the ins and outs of SEO so the content you produce can rank on Google,
  3. create a portfolio of 2 or 3 posts that prove you’re a good writer, and
  4. pound the pavement so you can secure those first few paying clients.

Will You Give Ghostwriting a Try?

Ultimately, ghostwriting can be a little divisive.

Some writers feel — passionately — that readers deserve to know exactly who wrote the words they’re reading. Others feel building your platform is too important to let someone else take credit.

But ghostwriting is a good way to make money as a writer.

And it doesn’t mean your platform is off the table. You can be a ghostwriter and have a writing career under your own name. Many writers, including me, simply use ghostwriting as a way to supplement or support their writing passions.

Personally, I think it’s worth it.

Only you can decide whether it’s right for you.

About the Author: Ali Luke blogs about the art, craft, and business of writing at Aliventures. If you’re interested in going further with ghostwriting or any type of freelance writing, check out her epic post: Freelance Writing: Ten Steps, Tons of Resources.

The post Ghostwriting 101: How to Get Paid Big Bucks As a Ghostwriter appeared first on Smart Blogger.

Source: https://smartblogger.com/ghostwriting/

Uncategorized

21 Blogging Milestones on the Path to World Domination

It’s okay to admit it.

That deep, dark secret you don’t want anyone to know.

That thought which keeps you up night after night.

You want… to rule the world!

You want to dominate your industry and be the envy of all. You want the house in the Hamptons and the spoils that go with it. You want two appetizers with your entree.

But you’re afraid.

You’re afraid of what others will say when they hear about your dream. You’re afraid it will seem too big — too crazy. Just like you’re afraid of what the waitress will think if you order onion rings and chicken tenders.

But mostly?

You’re afraid because you don’t know where to begin. You don’t know how to go from where you are as a blogger to where you want to be. You don’t know how to get from here to there.

The good news?

Just like eating an elephant, you don’t do it all in one bite.

World domination — or any major blogging goal — is a journey you take one milestone at a time.

For a handy visual of the 21 blogging milestones (that you can share and embed on your own site), check out the image below (click to see a larger view):

21 Blogging Milestones on the Path to World Domination

Embed This Infographic On Your Site

<!—– Copy and Paste This Code Into Your Post —-><a href=”https://smartblogger.com/bucket-list/”><img src=”https://smartblogger.com/wp-content/uploads/2014/11/21-blogging-miletones-infographic.png&#8221; alt=”21 Blogging Milestones on the Path to World Domination” width=”700 px” class=”noa3lazy”/></a><br><a href=”https://smartblogger.com/bucket-list/”>21 Blogging Milestones on the Path to World Domination from SmartBlogger.com</a>


Why Bloggers Need Meaningful Milestones

When you break large tasks into small, manageable ones, what once seemed big and scary isn’t as daunting.

Renovating your entire home? Start by painting a room. Training for a marathon? Walk to the end of your driveway. Want to start a rock band? Get a guitar and start practicing.

Blogging isn’t any different.

Your journey as a blogger is filled with incremental milestones. They start small, gradually increase in size, and culminate with you owning sharks with frickin’ laser beams attached to their heads.

Want 10,000 subscribers? Start with 100. Want to quit your job? Focus on making your first sale. Want to be Jon Morrow’s best friend? Get him to notice you.

These milestones comprise your bucket list. They highlight what you’ve already accomplished, what you’re striving toward next, and what still lies far ahead of you.

To help you in your quest, here are the 21 major blogging milestones (and how to reach each one).

Ready? Let’s dive in.

#1. Starting Your Blog

You’ve been talking about doing it forever.

You’ve been reading blogs like Smart Blogger, Blogging Wizard, and Be A Better Blogger for months.

You’ve been planning, scheming, and daydreaming about starting a blog for so long that people have started to worry about that glazed look in your eyes.

So don’t you think it’s time you finally did it?

How to Start a Blog
What to Do Next
Once your blog is up and running, it’s time to start writing.

But first, savor this moment. You’ve already accomplished more than many wannabe bloggers ever do…

You’ve started a blog. You did it.

Now…

Let’s get to work.

#2. Writing Your First Blog Post

Bloggers blog. It’s what we do.

So once you’ve setup your blog on WordPress, Medium, or wherever, it’s time to make this whole “blogging thing” official.

It’s time to write your first post.

How to Write a Blog Post
What to Do Next
After you publish your blog post, it’s time to promote it.

Share it with your friends and family on email and social media. Email it to your subscribers too (if you have any yet).

#3 Getting Your First Tweet

Getting your content shared on social media for the first time is a big milestone.

Each time your posts are tweeted, pinned, or liked, your content is exposed to new readers.

These new readers are potential email subscribers. Potential customers. Potential allies in your quest for world domination.

How to Get People to Share Your Content
  • Make it super easy to share your posts. Sharing buttons for Twitter, Pinterest, Facebook, etc. should be easy for your readers to find.
  • Make sure your posts are worthy. If you write posts that change your readers, they won’t be able to help themselves — they’ll have to share them.
  • Be tweetable. Use short, quotable messages in your posts.
  • Share it yourself. How can you expect others to share your content if you don’t?
What to Do Next
Be friendly and appreciative. When someone shares one of your posts, thank them. In addition to being good form, this act of gratitude will increase the likelihood they’ll share your posts again in the future.

To boost the number of shares you receive, try using interesting images with embedded headlines as the featured images in your posts. Be sure to choose a relevant picture, or one that creates curiosity.

#4. Receiving Your First Blog Comment From a Stranger

It finally happened.

The moment you discover someone other than your mom is reading your blog.

Your first comment from a stranger.

It’s the first sign you’re engaging a real audience (not just friends and family).

The first indication your words are striking a chord with readers.

The first evidence you have what it takes to succeed.

How to Get Blog Comments
  • Make it as easy as possible for visitors to comment. Don’t do anything to discourage engagement.
  • Visit other blogs in your niche and leave inquisitive, insightful comments. Many bloggers will return the favor.
  • Join relevant Facebook groups. People are down on Facebook these days, but being an active member of one or two Facebook groups is an excellent way to let prospective readers know your blog exists.
  • Give people what they want. Answer questions readers want answered, and they will comment.
What to Do Next
Were you raised in a barn? Thought not. So once you’ve received a comment, respond to it. Continue engaging with your reader.

Next, visit their blog and leave them a comment. If they don’t have a blog, thank them in an email.

True, this level of dedication will be difficult once you’re receiving dozens of comments.

But in your blog’s early days? There’s simply no good reason not to go above and beyond to express your appreciation.

After you’ve received a few comments, it’s time to implement strategies to further boost your comment count.

#5. Gaining Your First Email Subscriber

“The money is in the list,” says every blogger (even if nobody has asked them).

It’s cliché, but it’s true.

Email subscribers are far more likely to read, share, and engage with your content than someone who simply follows you on Twitter or “likes” you on Facebook.

Email cuts through the noise.

A person might receive a few dozen emails in a day, but they’ll receive several hundred (or more) tweets from their followers.

If you want to reach the top of the blogging mountain, you must build your email list.

And it all starts with that first subscriber.

How to Get Email Subscribers
  • Sign up for an email marketing provider. MailChimp has a free version, but if you want to send autoresponder emails, you’ll need the paid version or go to another provider like AWeber or GetResponse.
  • Prominently display an opt-in form. Once you have your email list, you need to put your opt-in form front and center where readers can easily find it.
  • Have a compelling call to action at the end of your posts. A focused CTA will increase the likelihood readers will subscribe.
  • Update your email signature. Include a link to your opt-in form in the signature of your outgoing emails, as well as your posts in blogging forums.
What to Do Next
Make your new subscriber feel welcomed.

When someone subscribes to your list, your welcome email should be warm and inviting.

Encourage them to ask you a question. Tell them to follow you on Twitter and say hello. Give them a link to an unexpected freebie bonus.

(But don’t do all three at once — you might scare away your only subscriber!)

Search engines love backlinks — they help them discover how pages are related, and in what ways.

Landing a high-quality link from a relevant website is great for SEO and results in more search engine traffic flocking to your website. And who doesn’t want that?

When a website links to yours, it’s effectively telling Google, “This dude is cool. He’s with me.”

Want to rule the world? You need Google to think you’re cool.

How to Get Backlinks
  • Create Massive Value Content. Epic posts are commented on, shared more, and linked to more often.
  • Implement a link building strategy. Broken link building, community site link building, and other tactics are out there for the blogger willing to roll up their sleeves and make them work.
  • Pound the proverbial pavement. Email outreach is time consuming, but it can be a highly effective method for acquiring backlinks — if you do it right.
  • Take it to the next level. Try advanced strategies like link reclamation and reverse image search.
What to Do Next
Keep going.

Numerous untapped backlink resources are available to bloggers willing to tap them. And if you don’t, your competitors will.

#7. Reaching 100 Visitors in a Single Day

In your blog’s early days, visitors are scarce. Occasionally, you’ll wonder if anyone is reading your blog.

But slowly, little by little, your numbers creep higher and higher.

And then it happens.

The day your blog reaches triple-digit visitors. The day your hard work begins to pay off. The day you get your first taste of power.

Intoxicating, isn’t it?

How to Get Blog Traffic
  • Promote on social media. Keep sharing your content on Twitter, Facebook, and Pinterest. Use hashtags to widen your reach.
  • Promote daily. While you shouldn’t publish daily, you should most definitely promote every day.
  • Concentrate on beginner-friendly traffic-generation techniques. Videos, infographics, and the like don’t work for beginners the way they work for established bloggers.
  • Put yourself in your readers’ shoes. Poor navigation, lots of ads, and a mobile-unfriendly design will alienate your readers and make them bounce from your blog.
What to Do Next
Implement strategies to keep readers on your blog longer. This increases dwell time, which is another way to get Google to like you.

Linking to other posts on your blog, embedding videos, displaying related posts, and encouraging readers to leave comments are all effective methods for keeping visitors on your website.

#8. Receiving Your First Piece of Fan Mail (Well, Email)

This is strange.

You receive an email from a stranger, but it has nothing to do with male enhancement or an unexpected inheritance from overseas.

It’s an email from a reader. And she’s telling you how much she enjoys your blog!

Your first “kudos” email from a reader is a big milestone for bloggers, and those who go on to rule the world receive many of them.

(Mine may or may not be printed, framed, and hanging from the walls of my office.)

How to Get (True) Fans
What to Do Next
Reply to the email. Thank your reader for contacting you, and try to answer any questions they may have asked.

But don’t stop there.

Follow them on social media. Visit and comment on their blog. Subscribe to their list, if you like what you see.

Your response will make a lasting impression in the mind of your reader. Don’t waste it.

#9. Getting Your First Negative Blog Comment

After weeks of praise, attaboys, and well-wishes, you receive your first negative comment.

You try to laugh it off by making a “these are where the tears would be if I could cry” joke, but it doesn’t work.

You’re confused. Hurt. Maybe a little angry. (Plus, your spouse quickly reminds you of the time you cried like a baby watching Field of Dreams.)

Don’t let it get you down. As you gain in popularity, criticism is inevitable.

Consider it a badge of honor — every popular blogger receives negative comments.

It’s proof you’re on the right track.

How to Reach This Milestone
  • Find your unique voice and stand out. Don’t be another me too blogger — be distinctive and memorable.
  • Be a troublemaker. Don’t be afraid to challenge the status quo.
  • Keep doing what you are doing. Haters are gonna hate. Just shake it off.
What to Do Next
As much as you would like to respond to the negative comment with a barrage of sarcastic wit and venom, don’t do it.

Delete the comment, ignore the comment, or respond to it in a professional manner. But whatever you do, remain calm. Don’t let the insults fly.

Others will see how you respond, and it will leave an indelible impression of you in their minds.

#10. Landing Your First Guest Post

Sooner or later, you’ll discover that commenting on other blogs and making friends on Twitter will boost your traffic only so far.

You need to reach new audiences.

As the marketing crowd would say, you need fresh eyeballs on your content.

In other words, you need to write a guest post.

How to Kick Tail as a Guest Blogger
  • Find your target. While it may seem like a good idea to write a post and then find a blog, it’s better to select a blog first and tailor your guest post around their audience.
  • Thoroughly read the guidelines. Make sure you know what’s expected of you, and avoid making dumb guest blogging mistakes.
  • Proofread! Take the time to properly proofread and edit your posts before submitting them.
  • Stay positive and persevere. Sometimes you have to contact your guest post target two or three times before getting accepted. Persistence often pays off.
What to Do Next
Your job isn’t finished once your guest post is published. No siree, Bob.

You need to promote the post on your social media accounts. You need to email the post to your mailing list (even if it’s small). You need to respond to any comments readers leave on the post.

And, most importantly, you need to thank the blogger or bloggers who gave you the opportunity to write for them.

Guest blogging, as much as anything, is about the connections you can make. Backlinks, traffic spikes, and a bump in email subscribers are all nice.

But establishing a long-term connection with an influential blog owner?

That’s worth its weight in gold.

#11. Getting Featured in Your First Interview or “Expert Roundup”

When people see you repeatedly mentioned on other sites via interviews and roundups, their perceptions of you change.

Yesterday, you were just an attractive guy or gal oozing talent but drowning in anonymity.

Today, you’re a freaking rock star.

You’re no more knowledgeable than you were moments earlier, but suddenly your powerful words carry more weight with readers. That’s because someone they trust just called you an expert (or treated you like one).

To reach world-leader status, others must view you as an authority. They need to consider you an expert in your industry.

Participating in interviews and roundups is a great way to make that happen.

How to Become an Influencer People Want to Interview or Quote
  • Create an awesome About Me page. Tell your story, share testimonials, and be sure to mention you’re available for interviews.
  • Help A Reporter Out. Sign up for HARO and you can receive multiple emails each day listing people who are looking for quotes from experts.
  • Make your Contact page easy to find. Don’t have one? Create one.
What to Do Next
Take advantage of the networking opportunities an interview or expert roundup creates.

If you’ve been interviewed, respond to those who leave comments. Engage with them. Give them a reason to visit your blog.

If you participated in a roundup, you now have some common ground with the other bloggers who participated.

Follow them on social media. Tag them when you tweet the roundup. Send them emails saying how much you enjoy their blogs.

#12. Hitting Your First 100 Email Subscribers

Finally.

After having single- and double-digit subscribers for what seems like forever, you finally reach 100. One hundred individuals decide they want updates from you.

These first 100 subscribers are arguably your most important.

They’re the ones who found your blog in its early days.

They’re the ones who decided to follow you before you were popular.

They’re the ones likely to be your biggest supporters as you rise through the ranks and vanquish kingdoms.

How to Get More Email Subscribers
  • Be a broken record. Keep finding reasons to mention your mailing list.
  • Give something away. Entice readers to subscribe to your list by offering something of value. And the sooner you have an opt-in bribe to offer, the better.
  • Promote your opt-in form on social media. Add an opt-in form to your Facebook page. Link to your form in your Twitter and LinkedIn bios.
  • Ramp up your guest blogging. With a little planning to maximize results, guest blogging is an excellent method for building your email list.
What to Do Next
Why not survey your subscribers? You’ve built a small tribe and it’s time to discover what they think.

Find out what kind of content they want you to create, and what kind of content they wish you would stop creating.

To encourage participation, turn your survey into a contest.

#13. Seeing a Post You Wrote Go Viral

Wow. That was unexpected.

One of your posts takes off. It goes viral, as the kids say.

At its simplest definition, a viral post is one which has a life beyond your own promotion of it. As such, it gets considerably more clicks and shares than your typical post.

And, as a result, your blog receives a nice (if temporary) bump in traffic.

Even if it’s short lived, a viral post means more eyes on your content. And that’s just what a prospective world ruler wants.

How to Go Viral
  • Create share-worthy content. If you want a post to go viral, it must be worthy.
  • Use social metadata. The better your posts look when shared on social media platforms, the more likely people will share them.
  • Be visual. Use stunning, shareable images in your posts.
  • Use an intriguing headline. Jon’s Headline Hacks has some great tips for headlines that go viral.
  • Make it easy to skim. People read only 28% of blog content. Make your content easy to skim, and you greatly increase the chances it could go viral.
  • Create list posts. According to a recent content marketing case study by Backlinko and BuzzSumo, list posts (like the one you’re reading now) get an average of 218% more shares than “how to” posts.
What to Do Next
Since the bump in traffic is only temporary, you must capitalize on it. You must turn as many of those visitors into subscribers as possible.

Make sure your call to action is clear and singularly focused. Offer a content upgrade for users who subscribe.

Use one of the dozens of available WordPress plugins designed to help you boost your subscriber count.

When Bob the bellhop from Bolivia mentions you on Twitter, a small handful of people will see it.

That’s nice.

But if John Lee Dumas, Pat Flynn, or Jeff Goins mentions you on Twitter, a small army will see it.

That’s even better.

When you’re mentioned or followed by an A-lister, it means much more than a small bump in traffic.

It means you’ve made it onto the radar of someone with influence.

How to Connect with Influencers
  • Link to A-listers in guest posts you write, and let them know about it. Most will be appreciative, and many will share your post with their followers.
  • Buy their courses or services. Want a sure-fire way to get A-list bloggers to notice you? Give them money! As an added bonus, you’ll benefit from their vast experience.
  • Reach out to them. Identify the bloggers of influence, and put your content directly in front of them.
  • Ask them to participate in expert roundups. Participants in roundups almost always share them.
What to Do Next
Just as a couple should keep wooing each other even after they’re married, you should continue doing the things which caused the A-list bloggers to notice you in the first place.

Keep sharing their content. Keep leaving comments. Keep engaging with them.

#15. Hitting Your First 1,000 Email Subscribers

Now we’re talking.

Around the time you hit the 1,000 subscriber mark, your emails begin to carry more weight.

You’re able to generate traffic for new posts simply by emailing your subscribers.

Even better?

You can begin making real money from your blog.

As a rule of thumb, you should be able to make at least $1 per subscriber each month — more if you really know what you’re doing.

How to Get Even More Email Subscribers
  • Have a dedicated landing page. You should have at least one page focused on one thing and one thing only — getting people to sign up.
  • Say yes to pop-ups. Yes, some people find them annoying. But they work.
  • Harness the power of webinars. They create a sense of urgency, but without being “salesy.” Plus, you can run one even if you have a limited budget.
  • Do more guest blogging. In case you haven’t yet picked up on the theme: strategic guest blogging is a solid strategy for gaining subscribers. Gaining traffic? Not so much. But gaining subscribers interested in your blog’s topic (assuming you’re guest blogging for relevant audiences)? Absolutely.
What to Do Next
It’s time to think about monetizing your blog.

Affiliate programs, sponsored content, digital products, and consulting/coaching sessions are common methods for making money with your blog.

And speaking of those last two…

#16. Successfully Selling Your First Product or Consulting Session

You tried your hand at sponsored ads. Maybe you even had a little success with them.

But eventually, you aim higher.

You decide to offer your skills as a coach or consultant.

Or maybe you decide to create your own digital product because you like the idea of unlimited income potential.

Whatever the route, the desire is the same: to pad your wallet with twenty dollar bills.

How to Reach This Milestone
  • Know your audience — intimately. To be a successful coach or consultant, you must know your audience, what they need, and how you can help them.
  • Choose a topic you know inside out. If you’re writing an e-book, pick your topic wisely.
  • Repurpose content. If you have been blogging for any length of time, you have a collection of archives begging to be republished as an e-book.
  • Master the art of ethical persuasion. Focus on benefits rather than features.
What to Do Next
Don’t rest on your laurels.

Once you’ve created your first product or course, create a sales funnel with an email autoresponder series.

Then start working on your next product.

#17 Reaching 1,000 Visitors a Day

When you reach 1,000 daily visitors, your blog will be perched at a level many bloggers never see.

Your blog has momentum, which means your email list starts to grow on its own.

You’re selling more products and services.

Your social media shares are increasing too, which is bringing even more new visitors.

Your hard work is paying off. “Soon,” you say to yourself before laughing maniacally.

“Soon.”

How to Get More Traffic
  • Strategically promote on social media. What gains traction on Pinterest won’t necessarily gain traction on Twitter, right? When promoting, always be mindful of the platform you’re using and adapt accordingly.
  • Become a SlideShare master. For many bloggers, SlideShare is an enigma. Unfortunate, because you can easily repurpose content with SlideShare and bring in thousands of new readers.
  • Think outside the box. Communities like Triberr and websites like Quora offer bloggers additional avenues for driving traffic to their sites.
  • Start taking SEO more seriously. Ranking for keywords and optimizing your blog for Google (and Bing) are a must to take your traffic to the next level.
What to Do Next
Resist the urge to publish more often. Even though you receive traffic bumps on the days you publish, your time will be better spent on promotion.

If anything, scale back on your blogging and focus even more time on promotion.

For example: targeted advertising. Facebook, Twitter, LinkedIn, and others offer bloggers the ability to advertise and bring in additional traffic to their sites.

#18. Reaching 100,000 Visitors in a Month

When you reach 100,000 visitors in a month, you’ve reached a level of success most can only dream of.

At this level, practically anything you try can be lucrative.

How to Boost Blog Traffic
  • Pay to extend your social media reach. Quuu Promote lets you get tweets and shares from real people with real followers.
  • Dedicate yourself. Mastering traffic generation takes time.
  • Start accepting guest posts. Neil Patel grew the KISSmetrics blog to over 400,000 readers a month by publishing content that mainly came from guests.
  • Use split testing to optimize conversions. At this level of traffic, even small tweaks can make a big difference.
  • Try new delivery channels. Launching a podcast allows you to reach a different audience than the one on your blog. So, too, can the creation of YouTube videos and SlideShare
What to Do Next
Dig into Google Analytics and learn how to make the most of its data. Discover which topics and posts are performing best, and optimize your blog accordingly. Identify your most important traffic sources, and adjust your outreach efforts.

And if you haven’t started monetizing your blog yet, you’re leaving real money on the table each month. Get started!

#19. You Hit 10,000 Email Subscribers

As Jon Morrow likes to say: 10,000 subscribers is the “magic number.”

With 10,000 subscribers, publishers beat down your door to give you a book deal.

With 10,000 subscribers, you could make a full-time living as a coach or consultant.

With 10,000 subscribers, you can easily sell a course you have created.

In short, earning a six-figure income from your blog is entirely realistic when you have 10,000 subscribers.

It’s arguably the most important blogging milestone.

How to Supercharge Your Email List
What to Do Next
Look for ways to improve your email open rates. It doesn’t matter how big your list is if nobody bothers to read your emails.

As your list grows, and your humble blog starts to look more like a viable business, you may need to trade your email provider for a more sophisticated solution, such as Infusionsoft that can handle e-commerce and relationship management as well.

#20. Finally Earning Enough Money to Quit Your Day Job

It’s the dream of most bloggers.

Being able to quit your job and blog full-time means you’re able to quit the rat race. It means you can set your own schedule, pursue your passions, and spend more time with your loved ones.

It means you’re the boss.

How to Quit Your Job
  • Charge premium prices. This allows you to devote more of your time, which means your premium price comes with premium service.
  • Outsource certain tasks. Time is money. And when you reach a certain level of success, your time (and money) can often be put to better use.
  • Promote affiliates. In addition to high income potential, affiliate products require zero investment.
  • Create joint ventures with other popular bloggers. Build a product together or just make it attractive for them to promote your products.
What to Do Next
Don’t quit your job just yet! Instead, create an exit plan.

Decide what kind of financial buffer you’ll need just in case things get tough. Your buffer will depend on your risk tolerance and personal situation, but a good rule of thumb is three to six months of salary in the bank.

Use the time leading up to your departure to ensure your blog is running smoothly by the time you quit.

Automate everything you can. Create processes to ensure you can work as efficiently as possible. Because when the paychecks stop, you don’t want any additional drag.

#21. Achieving World Domination

You did it.

They said it wasn’t possible, but you made it happen.

The world is your oyster. You’re the master of your own destiny.

And it’s all thanks to your blog.

Now it’s time to take a vacation. Maybe even move to paradise. Heck, you earned it.

So What’s Your Next Big Blogging Milestone?

You realize they’re yours for the taking, right?

The niche you want to dominate?

The house in the Hamptons?

The sharks with frickin’ laser beams attached to their heads?

They’re all out there… just waiting for you.

They’re waiting for you to decide, “Today is the day I’ll make my dreams come true.” They’re waiting for you to stop reading and start doing.

So, don’t just sit there.

Work out where you are on the list and what you must do to hit that next big milestone.

And let’s do this thing.

Because the world isn’t going to rule itself.

About the Author: Five years after first writing this post, Kevin J. Duncan’s dreams of quitting the rat race, blogging full-time, and world domination came true when Jon invited him to join the Smart Blogger team as our Blog Editor.

Never give up, folks. Never, ever give up.

The post 21 Blogging Milestones on the Path to World Domination appeared first on Smart Blogger.

Source: https://smartblogger.com/bucket-list/

Uncategorized

The Ultimate Guide to Content Curation (With Examples!)

Saving time, making connections with influencers, building authority — these are just some of the benefits of content curation.

But you might also have lots of questions like…

  • How much time should you spend curating content versus creating great posts of your own?
  • How can you make curated posts stand out amidst all the noise out there?
  • What tools can you use to speed up or even automate the process?

Well, here’s the good news:

In this post, I’ll answer all those questions about content curation and more.

If you’re new to the topic, I’ll explain exactly what content curation is and why you should do it. We’ll also explore some tools and tactics for streamlining your content curation process, saving you loads of time, even if you’ve been doing it a while.

And the best part…

Lots of real-world examples! You’ll see what’s working in the trenches right now, so you can model it for yourself.

Why Should I Consider Content Curation?

There’s an overabundance of information out there.

As I write, in the early evening, around 3 million blog posts have been published today, all vying for your attention.

Every second there are:

  • 8,320 Tweets sent
  • 888 Instagram photos uploaded
  • 3,550 Skype calls made
  • 66,233 GB of internet traffic logged
  • 71,596 Google searches performed
  • 76,892 YouTube videos watched
  • 2,758,518 emails sent

By 2020, an estimated 1.7 GB of data will be created for every person on earth — every second!

No-one can possibly keep up.

But with content curation, they don’t have to. Think of it like this:  

Imagine there was only one radio station that played every genre of music and broadcast all the news and talk-back shows ever made.  Your passion is country music, but it’s too hard to find amidst the noise of the other content.

Along comes a small, independent radio station dedicated to bringing you the best country music it can source. Everything about country music that entertains and informs you. All curated in one place for people like yourself to enjoy.

Which radio station will you tune into the most?

That’s why content curators are becoming increasingly important in a world of time-strapped, overwhelmed content-consumers. And that’s why every blogger, brand and business should consider curation as part of their content marketing strategy.

What is Content Curation?

Content curation is the art of sourcing, filtering and repackaging all forms of existing content to share with a specific audience to add value to their lives and save them time.

Phew. That’s quite a mouthful.

Let’s break it down into more bite-sized chunks before we delve into the detail of how to do it.

  • Sourcing:  First, you’ve got to find content that’s relevant to your niche and worthy of curating. Luckily, this post is jam-packed with tools to do just that.
  • Filtering:  This is where you sort the wheat from the chaff. Anyone can find a bucket load of content, but top curators add a filter of human analysis to make sure they’re sharing something valuable.  
  • Repackaging: Your curated content needs to look good. It needs to be well branded, consistently presented, easy to navigate and enticing enough for your audience to click through to the original content.
  • Existing content:  This can be blog posts, articles, videos, books, reviews, podcasts, music, infographics, lists, news, images — anything that is currently on the Internet, including your own content.
  • Specific audience: If you are doing any form of online marketing, you are serving a specific audience. Curated content is no different.  Their goals and intentions should be at the epicenter of your curation strategy.
  • Share:  You can share curated content in several ways. On social media, in a blog, a website, YouTube or an email newsletter. Or go for a combination — whatever works for your audience.
  • Add value:  This is at the heart of content curation. You need to make sense of it for your audience by putting it in context with their interests and lives. In its most basic form, this can be a summary of the content to allow readers to get the gist of the subject matter, but it should be an original summary created by you.
  • Save them time:  You are preparing and presenting content they need in an easy to digest format, which means they don’t have to go schlepping through the web to find it for themselves.

The Benefits of Content Curation

It Makes You a Trusted Authority

When you consistently curate relevant content for your audience — and add value with your insights — you become a go-to person for your topic.  

Before long, your audience will turn to you as one of their trusted sources because you know how to filter out the noise and deliver what’s important. You’re making it easier and faster to find what they’re looking for.

Example: Social Media Today is a website and daily newsletter with 104k subscribers. In addition to curating the top news stories and publishing their own articles, they also provide information on industry events and jobs and run regular Twitter chats on all things related to social media marketing.
Social Media Today

It Builds Your Credibility

Most businesses publish original content as part of their online marketing strategy. And that’s still a great approach. But sometimes it’s good to combine your advice with those of others. Curating work by other experts proves you care enough about your audience to bring them the best content — not just your own voice — which gives you greater credibility.

Example:  If anyone has the right to voice his own opinions it’s Brian Clark of CopyBlogger fame, one of the world’s most influential blogs. But Brian also chooses to share curated content through his weekly email Unemployable for freelancers. It is this generosity of time and knowledge that boosts his credibility and pays back big time when it comes to selling his fee-generating services.
Unemployable

It Establishes Connections with Influencers

Every time you curate content produced by an influencer or include their expert opinion in a curated list post of your own, you are endorsing their views and opening them up to a new audience.

It also helps put you on their radar.

You can draw their attention by tagging them on social media when you share their work, or emailing them a link to your curated blog post. Content curation is a great way to build solid relationships with top influencers in your niche, but only if you get it right.  Like this:

Example: Mashable.com is a digital media site, which published a guest post by Aaron Orendorff about growth hacking strategies.  In it he curates advice from 25 influencers and includes their headshots and links back to their sites.  The post received a total of 4.4k shares across social media, and I bet I know where 25 of those came from.

It Makes You a Trend Spotter

When you spend a couple of hours a day sourcing relevant and interesting content, you can’t help but increase your knowledge. You’ll start recognizing patterns and trends as they’re happening, and gaps in existing content you might be able to fill.

Not only does this add value for your audience, but it also makes you a credible expert in your niche and one to watch.

Example: CB Insights mines massive amounts (I’m talking terabytes) of data to identify and make sense of emerging technology and business trends for its customers. And it puts this to good use by sharing its often-irreverent insights and curated findings in its free daily newsletter to over 537,000 subscribers.
CB Insights 

It Can Boost Your Google Ranking (When You Get It Right)

Many people think curated content could harm your Google ranking because it’s seen as duplicate content. And that’s true, if you do nothing but reproduce the original.  

But content curation is all aboutadding value.

Here’s proof.  The folks at Bruce Clay Inc. ran a test to see what ranking Google would give to curated content on their blog versus the original. You can read the full details here.

Bottom line: When they reproduced the original post without adding value, the ranking went down from 4th place to 10th. But when they published an excerpt of the original with theirown summary and links, the ranking shot up to 1st place — even higher than the original post.

Bruce Clay Google Rankings
Example: SmartBrief.com  (“We read everything. You get what matters.”) is a curator of industry news. It’s easy to navigate with every piece of content summarized in their own words, which adds value for their readers and brownie points with Google.
SmartBrief

It Can Help Build Your Social Media Following, Faster

As a curator, your output of content will increase, giving you a lot more to Tweet about on a regular basis. But remember, always aim to add value, not simply retweet or share.

Example: TheSkimm is a curated subscription service for female millennials — over 7 million subscribers. It delivers its content via audio, video, an app, and of course, social media:  They have 608k followers on Instagram, 246k on Twitter, over 1.1m likes and followers on Facebook, and 465k views on YouTube.  That’s an impressive social media presence.
theSkimm

It Can Grow Communities and Conversations

Great content curation encourages debate and feedback.  When you add your own insights and respond to audience comments by providing them with more of what they want, it can attract other like-minded people to your knowledge “hug.”

They come not just to seek information from you but also to share content and support each other.

Example: TED.com is one of the best-known global communities. At its core, it’s a curator of ideas, or as they put it in their mission statement: “We’re building a clearinghouse of free knowledge from the world’s most inspired thinkers — and a community of curious souls to engage with ideas and each other.” With an online community of tens of thousands, over 11 million Twitter followers, and 35 people watching a TED Talk every second, I reckon they’ve accomplished their mission.
TED

The Myths of Content Curation

It Saves You a Truckload of Time

When done properly, the full process of content curation can take just as much time as creating original content. Sometimes more.

You have to source, repackage and share a ton of information. Sure, this can be done more efficiently with automated tools. But you must also spend time filtering the content, adding insight and perspective, and building relationships with influencers and other publishers.

This is where the real value of content curation kicks in. And it takes time.

With curation, the volume of your published and shared content will increase, but your ability to spend more time with your feet up enjoying a beer won’t.

So, don’t become a content curator if your sole purpose is to save time.

All You Have to Do Is Find Relevant Content and Pump It out to Your Subscribers

If you just share every blog post and article you find on your topic without any filtering, you can do more harm than good to your brand and reputation.

The content you curate will reflect directly on your credibility and reputation, so choose wisely.

You Never Have to Worry About Creating Your Own Content Again

Undoubtedly, content curation is a great way to build authority in your niche, but it’s rare to find a site that relies 100% on curated content. Research has shown that creating your own content is more valuable regarding conversions.

And let’s face it. That’s one of the main reasons we do content marketing of any kind.

The research is explained by Tristan Handy in this post, who says the ratio for publishing curated v. original content on social media is around 60:40.

This isn’t a hard and fast rule, and everyone needs to find their own sweet spot, but it’s not a bad guideline if you’re just starting out.

Content Curation Strategy: How to Get Results

Give Your Audience What It Wants

What are they looking for when they seek information? What are they sharing on social media? Are they looking for comparisons and reviews, or the latest industry trends? Do they want to be entertained, inspired or informed?

If you don’t have an existing audience, read this post.  If you do have an audience, but you’re still not sure what they’re looking for, read this post.

Example: Further.com is a curated weekly email targeted directly at Generation X, by Brian Clark, one of the most influential Generation X-ers on the net. He knows what they’re thinking, feeling and aspiring to, and he delivers in spades.
FURTHER

Source Valuable Content

Overwhelming as it seems when you start out, sourcing great content is not hard, especially with so many automated tools at your fingertips.    

RSS feed readers are the first go-to source of content for curators. Using tools such as Flipboard allows you to search by URL or topic and collate your content into categories.

Social media is the next main source, and again you have a myriad of tools at your disposal. For example, Social Searcher is a free platform that allows you to search by hashtags or topics and brings up every post published on the major social media sites.

Or you can create a Twitter list to collate the accounts you follow.

Find the right tools from the list below for your content sourcing and collating purposes, and remember to stay focused when you go searching. You can easily disappear down a rabbit warren of irrelevant information.

And finally, don’t forget your own blog or social media pages as a source of content.

Select posts that have done well in the past and may resonate with a new audience. Or think about repurposing or updating an old post.  Here’s a great example of curating your content from Copyblogger.

Filter Your Content

Content curation without filtering is a no-no. This is part of the process that’s going to demand time and attention, but it’s worth it.

Once you have a good collection of content, filter each piece through these questions:

  • Is it well written or produced?
  • Is it relevant to my audience? Does it satisfy a need or curiosity of theirs?
  • Is it timely, or has it been recently updated?
  • Is it in context with everything else I have published or curated?
  • Will it reflect well on my brand?

If the answer is yes, keep that piece of content and move on to the next step. If it’s no, dump it.

Always Add Value

There’s one more important consideration before you hit that share button.  You need to add value.

You know the content is worthy of sharing because you’ve filtered it. Now you need to tell your audience why.  The following are some of the ways you can add value:

  • Add a brief introduction in your own words.
  • Put it in context for your audience. Make them understand why you think it’s important for them to see.
  • Highlight something specific in the article.
  • Change the headline using the language and voice your audience would relate to.
  • Likewise, think about using a different image to add your own personality or perspective to the original.
  • Add a call to action or a link to a relevant post or free download of your own to give them further information relevant to the curated piece. Doing so also helps to keep your original content on their radar.

Make It Look Good

Think about a museum curator. Their job is to present an exhibition of works in a manner that makes sense.

They encourage visitors in by making the collection look enticing. They often separate subcategories by rooms or open spaces. They add information and insights to each piece and present them in a logical flow.

They don’t take random artworks, dump them in the middle of a room and expect visitors to work it out for themselves. Neither should you.  

Think about how you’ll best present your curated content on your website or in a newsletter.

And above all, make sure you consistently represent and reflect your brand, whether that’s through the use of your logo and colors, your voice, the language you use or the content you curate.

Example: brainpickings.com by Maria Popova is a fine example of a well-presented and branded website with some of the most thoughtful and insightful curations on the web today.
brainpickings

Dedicate Time

Aim to make the practice of curation a daily habit.

When you’re starting out, set aside at least an hour a day to source, filter and add value to existing content. Build up a collection of quality content, enhanced with your own insights, that you know your audience will love.

Be Ethical

The curating and sharing of content created by others is growing in popularity with proven success rates when it’s done right. And successful curators always follow these golden rules:

  • Credit the creator of the work prominently, and link back to the source.
  • Never knowingly infringe copyright.
  • Don’t rely too heavily on one or two curation sources. At best it makes you appear lazy. At worst it could be interpreted as riding off the back of the original creator’s work.
  • Avoid reproducing too much of the original work. Add value by offering your own headline, or insight, but give your readers the motivation to click to the source to read more.

Find the Right Distribution Channels and Publishing Schedule

Hands up anyone who’s shared anything on social media.

That’s how easy content curation can be when you’re starting off.  However, you should aim to use a variety of distribution channels as your curation efforts take wings.  The four main ones are as follows:

Social Media

Make sure you add your own introduction or insights to shared links, giving your audience a reason to click through to the original. Like this:

Spin Sucks

Your Blog

This is where you can produce original posts featuring curated content (think “best of” posts, or list posts of tools and resources). Here’s a great example from CXL, which has curated 10 of its own articles in this post.

CXL

Email Newsletters

Send them out daily, weekly — whatever works best for you. Just make sure it’s at the same time each day or week so you can condition your audience to look forward to them.  Convince & Convert’s email turns up in my inbox as regular as clockwork once a week with a mixture of curated and original content.

Convince & Convert

Websites

Dedicating a website to content curation is best left until you’ve built your skills as a curator through some of the less demanding channels like social media and your blog.  

While you can build a successful content curation site on your own (take brainpickings.org, for example), mainstream information streams like Redef offer up a daily mix of hand-picked content that takes a sizeable team to curate and maintain.

REDEF

So, depending on the time sensitivity of your curated content and the method you’ll use to distribute it, you might aim to share on social media every second day, and publish a newsletter or blog post weekly, or monthly if that feels more doable.

If you dive right in with a daily email or a dedicated website, you may create a monster you wish you’d never started.  

You can always increase the regularity of your content distribution once you become more confident.

Now, set up a social media publishing schedule in whatever program or content curation tool you feel comfortable with.  But a word of warning: Don’t schedule social media posts too far in advance. You want them to be as fresh and timely as possible.

The following are some additional things to think about regarding distribution and timing:

  • Always make sure your curated content adds value, is well presented, and properly reflects your brand before you hit that share button or start to design an email newsletter.
  • Think about the environment your content will appear in, and decide if you need to adjust the headline, or the size of the image to suit the different platforms.
  • Likewise, you may need to produce variations of your introduction and insights to suit a Twitter feed versus a Facebook post, for example.
  • Do your research around the best times to schedule social media posts and email newsletters, and try to consistently stick to the same schedule for your emails so that your audience begins to anticipate their arrival.

Reach Out to Influencers

If you want your curated content to fly, you should reach out to influencers. Here’s how you do it:

First, read this post and start practicing some of the techniques to get on your favorite influencer’s radar.

Next, when you’ve created your first blog post of curated links (a list of the best, or a round-up post for example), reach out to the influencers you’ve mentioned in the post. Here’s how you find their email addresses.

You want to send your email before you publish.  Something along these lines:

Hey [name of influencer],

I wanted to give you the heads up that we’re just about to publish a curated list of the top 20 tools and resources for freelancers, and you made the list because [tailor your reason why they made the cut].

We’re hoping to publish within the next few days, and I’ll send you the link as soon as it goes live.

Thanks for being a continued inspiration.

Cheers, [your name]

Now you’ve got their attention, and they’ll likely be curious about your post. As soon as it goes live, send them a follow-up email:

Hey [name of influencer],

Here’s the link to the curated post I mentioned in my last email: The Top 20 Tools and Resources for Freelancers

[Name of influencer’s site] is included as #5.

If you think it deserves a share, we’d be grateful for the exposure.

Either way, we were delighted to include you in our round-up.

Cheers, [your name]

Finally, when you’re sharing other curated content in social media, tag the original creator to let them know you’re sharing their work.

But make sure you add value by highlighting something important. You need to demonstrate you’ve read their work and why it’s of value to your audience.

A simple retweet or share won’t impress them.

10 Examples of Killer Content Curation

The following examples are great picks because they all demonstrate at least one outstanding quality of content curation, and together they showcase a cross-section of distribution channels and topics.

#1. Kottke.org: Blog

Founded by Jason Kottke in 1998, Kottke.org is one of the oldest blogs on the net.  Jason (almost) single-handedly curates and creates content across several different topics.

In January 2018, Jason launchedNoticing, an email newsletter with a curated roundup of the week’s posts on Kottke.org.  He has even curated a collection of more than 2,000 books and products he’s linked to over the years, entitled The Accidental Shop, all of which you can purchase at Amazon.

Why is it killer curation?  Because the blog and website are nurtured and maintained by an individual with a strong personable voice. Jason curates and writes about what interests him, but in doing so, he reveals what’s interesting about himself, which is an attractive quality. This organic, hands-on approach to his work has built a loyal following of subscribers and members whom he talks to like old friends.

Kottke

#2. Deadspin.com: Website

This one is for all you sports lovers, as long as you don’t mind a healthy dose of humor and sarcasm served up with your daily news and commentary.  Edited by Megan Greenwell, Deadspin has broken several major stories making it a credible and widely-followed source of sports information for its mainly male community. It also distributes a weekly newsletter to subscribers.

Why is it killer curation?  It knows exactly what its audience is looking for and serves them well.  It’s brash but unpretentious. It’s a visually appealing site, relying heavily on videos and images. Above all, its conversational tone makes it feel more like chatting to your buddies about the latest game than a staid news site. Bang on brand.

Deadspin

#3. The Moz Top 10: Email Newsletter

The Moz Top 10 newsletter is emailed to subscribers every two weeks. In addition to the newsletter and its prolific social media sites, Moz publishes a blog (with daily updates emailed to subscribers) and its famous Whiteboard Friday videos.

Why is it killer curation?  Moz.com (founded by former CEO, Rand Fishkin) is one of the leading authorities on anything SEO and digital marketing. But you knew that, right?  So, when they say they’ll share the“10 most valuable articles about SEO and online marketing that we could find,” you know they’ll dish up the goods.  This email is killer curation because it’s current in a rapidly changing arena. It’s on point and unfussy, it’s easy to navigate, it adds considerable value and saves time.

Moz Top Ten

#4. Smashing Magazine: Website

Smashing Magazine is a curated information resource for web designers and developers.  The website is fun and quirky (what’s with the cats?) while being chock full of articles, books, and even a job postings board. You can also subscribe to a newsletter, emailed out every two weeks.

Why is it killer curation?  As you would expect from web developers, the site is beautifully designed and easy to navigate with just the right number of tricks to be impressive, without being distracting. But it’s the community focus that’s most impressive. The passion for their subject matter really shines through, as does their desire to serve and support their audience with the best content and resources.

Smashing

#5. Rohit Bhargava: Twitter Account

Rohit Bhargava is a marketing expert who describes himself as a “trend curator.” When he’s not teaching, blogging, writing books, or giving keynote presentations, he Tweets. At least daily.

Rohit is the founder of the Non-Obvious company, which monitors and reports on trends and provides weekly insights through its email newsletter. It also runs the Non-Obvious book awards, which is a by-product of all the reading Rohit and his team do to curate ideas for their annual trends list.

Why is it killer curation?  Rohit’s Twitter feed is full of links to funny, informative, thought-provoking, trend-setting insights.  He has an innate sense of balance between light-hearted and serious, and he injects just enough of his content and promotion to remain credible. Which is why he has amassed an impressive 34.3k followers.

Rohit Bhargava - Twitter

#6. Next Draft: Email Newsletter

Every day, Dave Pell sends out his news round-up — Next Draft. He curates ten items a day that he considers to be the essential, fascinating bits of information you need, without you having to go search for them.  Or, as he puts it on his website,“I am the algorithm.”

Why is it killer curation?  Because he does thisevery day. He takes content curation to the next level with his analysis and insightful commentary. But he’s also funny, wacky, and devilish enough to make you lust after his next email.

Next Draft  

#7. Rocumentaries.com: Website

And now for something completely different — documentaries that rock your world. This is a collection of documentaries from BBC, Channel 4, Netflix, VICE, YouTube and more. You can browse the website or subscribe to the email for the latest picks.

Why is it killer curation?  Because the site is wonderfully minimalist and focused. This is for and by lovers of documentaries. Nothing more and nothing less. You can sort by genre, sources, or recommendations and read the original curation notes before deciding which ones to download.

rocumentaries

#8. Growth.email: Email Newsletter

This is another simple but highly targeted email. Compiled by Miles Burke, Growth.email delivers ten articles a week that have been carefully sourced, analyzed and curated. The theme, as the name suggests, is about growing revenue and business.

Why is it killer curation?  There is no fluff. This is a thoughtfully curated collection of ten articles a week that has the audience’s interests firmly in mind. Miles does this on his own, for free. It’s content curation at its purest.

growth.email

#9. Really Good Emails: Website, Email Newsletter and YouTube Channel

This site is a curated collection for email marketing geeks. It has curated and showcased almost 4,000 email designs to date, and it provides practical and insightful critiques through its YouTube Channel, Feedback Friday.  Every week it sends an email round-up of curated links to its subscribers entitled “News and articles we thought you’d like.”

Why is it killer curation?  This is one of those emails I really enjoy seeing in my inbox. It’s inspirational, educational, fun and I think I’ve clicked through to a link from every email I’ve received. Which is what you’d expect from email marketing experts.

Really Good Emails

#10. Wirecutter.com: Website

Wirecutter provides news and recommendations for its readers about the best gear and gadgets it can find. With detailed reviews, interviews and data, this is a curated gallery of diverse and insanely useful items with links back to the sellers.

The website also has a Deals page with the latest retail discounts updated daily and sent to your inbox via an email newsletter.

Why is it killer curation?  This is curation with a difference. The team at Wirecutter spend hours, weeks and sometimes months researching and testing products to make shopping easy for their audience. From TVs to toilet brushes, everything is scrutinized with precision and care to establish the best product to buy in each category. The site is easy to navigate, insanely useful and hugely addictive.

wirecutter

Content Curation Tools

I haven’t set out to give you an exhaustive list. No-one ever could. Tools come and go on the Internet all the time.

Instead, I’ve researched as many as possible to bring you a good cross section of 20 automated content curation tools. Most of them are free, some have a free trial period before you need to start paying, and a couple are for the more dedicated and experienced curators with paid plans to match.

Explore the features and decide which are the best fit for your business.

Best Tools for Sourcing and Collating Content

Feedly

Feedly

Feedly lets you source content from almost anywhere on the web and organize it in your feeds. You can sort by topic, save to read later, and even share directly to your social media accounts.  Its free for up to 100 sources and three feeds, and $5.41/month for the pro version.

NewsBlur

NewsBlur

Similar to Feedly, Newsblur is a free personal news reader that allows you to read content from 64 sites in their original format and save by categories. If you upgrade to the premium account ($36/year), you get access to unlimited sources, custom tags and more.

InoReader

InoReader

InoReader is another free reader that gives you access to an unlimited number of feeds and archived content. You can use folders and tags to sort and collate your content, and it’s quick and easy to get up and running. The starter plan is just $14.99/year to get rid of the ads and enjoy a customizable dashboard.

InstaPaper

InstaPaper

Instapaper has a beautifully simple interface and lets you source and collate content from anywhere on the web. The best feature is adding highlights and comments to any article, but you’ll need to upgrade to the premium account for $2.00/month to unlock the unlimited version of notes and other features.

Vidinterest

Vidinterest

No list of curation tools would be complete without one dedicated to videos. Vidinterest supports videos from YouTube, Daily Motion and Vimeo, and while other tools support a wider range of sources, Vidinterest is free. Plus you can earn affiliate dollars by writing and sharing reviews.

Social Searcher

Social Searcher

A gazillion tools can help you source content from social media platforms, but I like Social Searcher because you can start using it without registering an account. This gives you access to real-time searches across 12 social media platforms, data analytics and the ability to sort by date or popularity. Upgrade to the basic plan for around $4/month and you can start saving your searches and monitoring data results.

Blog Lovin’

Blog Lovin'

You’ve gotta love Blog Lovin’! It keeps all of the blogs you follow in one place and updates your feed as they publish new posts. It operates like a cross between a news reader and a social media platform, with love and comment buttons and a card layout like Pinterest. And it’s free.

Flow Reader

flowreader

Flow Reader is the best free content sourcing and collating tool in this list because you can combine your RSS and social network feeds in one platform.

Best Tools for Sharing Curated Content on Social Media and Your Blog

CrowdFire

CrowdFire

With over 19 million users, Crowdfire is a crowd pleaser regarding content curation. Source from social media and other websites and blogs with its new RSS feature. Customize and schedule posts for each social media profile. It’s free for unlimited curation and up to 10 posts/month on Twitter, Facebook, Instagram and LinkedIn. It’s $9.90/month for the plus account.

DrumUp

DrumUp

DrumUp lets you source, collate and share content across multiple social media accounts. You can get hashtag and content recommendations to suit your audience, share directly from the Chrome extension and track and measure engagement. DrumUp has a limited free plan, and the paid plans start at $15/month.

Triberr

Triberr

Triberr is a content marketing tool wrapped up in a community of like-minded bloggers. Firstly, it helps you source and share content across your social media accounts. But you can also follow and share posts from tribes of bloggers and influencers and get invited to become a member. You can get started on Triberr for free, or unlock additional features for $20/year.

Tailwind

Tailwind

If your content marketing is focused on Pinterest and Instagram, this one’s for you. With Tailwind, you can source, schedule and publish across both platforms and monitor and track the success of your efforts. There’s a free trial period, but the paid plan for bloggers and small businesses starts at an affordable $9.99/month.

Tweeted Times

Tweeted Times

The Tweeted Times helps you create a curated online newspaper from the most relevant content on Twitter to share with your followers. You can get basic branding and promotion for your newspaper for free, or pay $15/month to unlock more features in the pro plan.

Curation Soft

Curation Soft

This is the only software included in the list. It’s compatible with several major platforms including WordPress, Blogger and Facebook. CurationSoft is easy to use. You can search for content by keyword across blogs and social media, drag and drop, add your own commentary and post. It comes with a 14-day free trial and costs $49/year for the annual plan or $5/month for a pay-as-you-go plan.

Best Tools for Publishing Curated Email Newsletters

Elink

Elink

Elink is a visual collection of curated links that are shareable in an email newsletter and other online formats. From Elink you can source content, design and personalize your email, add curated links and send it to your subscribers via Mailchimp. Elink has a free 14-day trial, and then it costs $12/month.

Nuzzel

Nuzzel

Nuzzel is a free Twitter and Facebook news monitoring and research tool that also sends out automatically generated or self-curated social newsletters. Subscribers to your newsletter receive a daily email containing the top five stories from your Nuzzel feed or any stories you want to include.

Revue

Revue

Revue is an email newsletter tool that connects to a range of social media and other content curation tools to build the content for your newsletter. It’s free for up to 50 subscribers and $5/month (or more as your subscriber numbers increase).

Best Tools for the Full Package

Content Studio

Content Studio

With Content Studio, you can source and filter trending content and share it across your social media accounts, blog and email marketing platforms. The free subscription allows you to publish up to 500 posts/month to two social media accounts, but you’ll need to upgrade to the $49/month pro plan for unlimited social media and blog publishing.

Publish This

Publish This

Publish This is another full package content curation tool that lets you curate and publish content in newsletters and social media accounts. It’s free to start, but paid plans start at a slightly higher $99/month.

Scoop.it!

Scoop.it

With Scoop.it, you can source content and publish it across your social media accounts, in your blog, your website or your newsletters. But you can only publish to one social media account with the free subscription and publish to five with the pro subscription ($14.99/month).  If you want to embed on your website or publish newsletters, you will need to upgrade again to plus for $67/month, so this is a tool you will need to grow into.

Can You Hire Content Curators to Do This?

Sure, you can hire a freelancer or VA to do several content marketing tasks for you. But consider a few things before you search Google.

Whenever you outsource work, you’ll have a trade-off. No-one will know your brand and voice as well as you unless they work with you consistently over a length of time.

So, you need to decide what functions of your content curation you are comfortable outsourcing and what needs to be done by you to retain an authentic relationship with your audience. My suggestion is that with a good brief, you can hire a VA to:

  • Source content in your niche
  • Filter the content to validate its quality and relevancy
  • Research topics/content for curated blog posts
  • Schedule your social media posts
  • Track audience metrics

You still need to add your own voice and insights to your curated content before sharing it, but a VA can do a lot of the time-consuming implementation tasks, freeing up your time to focus on strategy and relationship building.

And secondly, it might not be a smart move to outsource your content curation until you have mastered the discipline yourself with the aid of the tools available.  You’ll be in a much better position to work effectively with a VA down the road once you have tested curation firsthand and understand the needs and interests of your audience.

The Bottom Line on Content Curation

A final word of advice: In your rush to embrace your new curation skills, don’t ever stop writing your own blog or producing your own videos and podcasts. Just ease back a little (remember that 60:40 rule of thumb).

Curation can certainly lighten the load and open new doors, but it will never replace the authority-building power that comes with creating original content.

What it does give you is a stack of new opportunities to build relationships with influencers and turbo-charge your social media following.   

Just remember — always filter the content you source, always add value with your own insights and find a publishing schedule that works for you.

The grind of having to come up with something fresh and original on a daily basis is relegated to the past.  You’re now armed with the strategy and tools to become a killer content curator!

So, go get ‘em!

About the Author

Mel Wicks is a seasoned copywriter who helps bloggers and business owners bring the ‘wow-where-do-I- sign-up’ oomph to their writing.  Give your original content a shot in the arm with her free ‘No-Fluff Guide to Writing Epic Blog Posts Every Time’.

The post The Ultimate Guide to Content Curation (With Examples!) appeared first on Smart Blogger.

Source: https://smartblogger.com/content-curation/

Uncategorized

Income Report – January 2019 – Let’s Get This Started!

Woop woop! Finally after about 2 years of wanting to do income reports and having an empty hidden category for this on my blog (how’s that for some serious procrastination!). I have pulled my finger out and finally got it done! Strange thing is, as im writing this blog post and report it is strangely …

Income Report – January 2019 – Let’s Get This Started! Read More »

from First Stop IM – Lewis Turner – Journey To Millions http://firststopim.com/income-updates/income-report-january-2019-lets-get-this-started/
Source: https://firststopim.tumblr.com/post/182479312723

Uncategorized

10 Things You’ll Only Understand If You’re a Domain Name Junkie

It’s an addiction like any other.

Ten or twenty bucks will scratch that itch, but the high never lasts, and before long you’re craving the next hit.

And the worst part? Nobody understands.

Except just maybe a fellow addict…

“Hello. My name is Glen, and I’m a domain name junkie. My last domain purchase was three weeks, four days and seven hours ago.”

That’s how I’d introduce myself to the support group. (You know, the one that doesn’t exist yet.) I’d stand up and tell my story to a circle of fellow addicts, who’d nod their silent support.

My own addiction started with an act of vanity — I acquired the .COM version of my own name. That was 17 years ago, and owning a piece of Internet real estate was novel and exciting.

But that first domain registration, like the first high from an illicit drug, set me on the path to dependency.

The Telltale Signs of a Destructive Domain Habit

Like many addicts, I failed to acknowledge my problem until it was too late.

For years I told myself buying domains was just a harmless hobby. Something to do on evenings and weekends to help unwind after work. But over time my hobby became a powerful obsession.

I’d wake up each morning with a head full of new domain ideas and a burning desire to check their availability. At social occasions, I’d sneak out of the room to browse domain resale sites on my smartphone.

And despite plans to become a savvy domain “flipper,” I was selling almost none of the domains I bought, instead keeping them for personal use.

Eventually, my behavior became more erratic. I would buy any domains I could get my hands on — .ORGs, .COs, even .INFOs.

One Monday morning I hit rock bottom when I found a dozen GoDaddy receipts in my inbox for domains that had no practical purpose. Worse still, I couldn’t even remember buying them.

These days I’m on the road to recovery, and my mission is to help other addicts.

So take a careful look at the list below, and see if you recognize any of these destructive behaviors.

If so, you might just be a domain name junkie.

#1. You Just Can’t Quit GoDaddy

You Just Can't Quit GoDaddy

When you’re a domain name junkie, you struggle to think about anything else. You spend every idle moment brainstorming cool domains for your “someday, one day” online projects.

And once an idea has surfaced, you simply must know — is the name already taken? It doesn’t matter where you are, at work, at home, even in bed. You have to know.

When you discover the domain has already been taken (the good ones usually are), you start the search for viable alternatives.

And once you’ve dived down the rabbit hole, you can hardly crawl back out.

#2. You Lie About How Many Domains You Own

You Lie About How Many Domains You Own

When you start collecting domains, it’s fun to log in to your account and delight in the breadth of your online kingdom.

But one day you reach the point where that list of domains is a painful reminder of a habit that’s out of control.

When your partner catches you buying yet another domain and casually asks, “How many is that now?” you pretend you don’t know, or deliberately lowball the true number.

But of course, lying is a telltale sign your casual hobby has turned into a serious problem.

#3. You’ve Started Dabbling in the Newer TLDs

You've Started Dabbling in the Newer TLDs

In the beginning (well, 1985), just six top-level domains (TLDs): .COM, .ORG, .NET, .EDU, .GOV and .MIL existed, but that list has since snowballed.

Today we have more than 1,500 TLDs including .COFFEE, .LAWYER and .PORN.

On the one hand, domains are more plentiful than ever, and even if your dream .COM is long gone, you have hundreds of other options for snagging a snappy name.

On the other hand,  who knows how much prestige these newer domains will hold over the longer term? Nobody wants to build their blog around the domain equivalent of a pet rock.

Some domain junkies won’t look beyond .COM, but if you’re exploring the murkier end of the market (.CM anyone?), it might be a sign that your hobby’s taking a worrying turn.

#4. You Tell Yourself You’re a “Domain Investor”

You Tell Yourself You're a Domain Investor

When your domain account lists tens (or even hundreds) of seemingly random domain purchases, there are two ways to explain it.

Either it’s the result of years of clueless impulse buying from a click-happy domain junkie with no more strategy than a half-blind pigeon pecking in the dirt.

Or it’s the culmination of a strategic acquisition campaign to build a valuable portfolio of undervalued digital assets for future sale.

Not surprisingly, most domain name “enthusiasts” favor the second version.

But deep down, if you suspect there’s very little method to your madness, it might be time to go cold turkey on domains.

#5. You Read the Thesaurus… for Fun

When Your Date Asks About Your Favorite Book...

Not every domain you dream up will be available for registration. The truth is, most won’t.

That’s why a thesaurus is a domain collector’s best friend. In fact, uncovering snappy synonyms for your latest near-miss idea can be a lot of fun.

But if a thesaurus has become your favorite bedtime read (you know, just in case a cool domain idea jumps out) it may be time to seek professional help.

Because — wake up call! — it’s a reference book, not the latest Jack Reacher.

#6. You Secretly Stalk the Person Who Owns YourName.com

You Secretly Hate the Person Who Owns YourName.com

I was lucky. I grabbed my personal domain before anyone else could.

But if you have a popular birth name, or you were just too slow to the punch, your best options may already have gone. And that really stings.

Because when your name’s John Brown, telling people your treasured home on the Internet is TheRealJohnWBrown.info is plain embarrassing.

And that’s why you secretly stalk the person who nabbed your name online. You stake out their website, mentally mocking their pathetic efforts while waiting patiently for the right moment to pounce.

Because one day, they’ll forget to renew that domain and then, my friend, victory will be yours.

#7. You’ve Felt the Pain of “Lapsers Remorse”

You've Felt the Pain of Lapser's Remorse

Sometimes you see a domain for what it is — a dumb impulse purchase you’ll never be able to use or resell.

Maybe you tried to make money by listing it for sale at a couple of domain marketplaces but didn’t get the faintest sniff of interest.

So when it comes up for renewal, you do the sensible thing and let it lapse. You even feel good about your level-headed decision.

Weeks later, you casually check to see if anyone’s re-registered it and find it’s now listed on a “premium domains” site for $3,000!

Of course, just because it’s listed for thousands doesn’t mean it’s worth thousands.

But you can’t escape the feeling you let a valuable domain slip through your fingers.

#8. You’re Considering a Domain-Inspired Career Move

You're Considering a Domain-Inspired Career Move

Sometimes you’ll stumble across a domain name that’s so good you simply have to own it… even though it’s totally unrelated to your work or hobbies.

The smart move would be to snag it and sell it for a profit to someone who can make good use of it. But like Gollum and that damned ring, you can’t quite bring yourself to part with it.

So your brain starts to explore a future possible world where you become the person for whom this is the perfect domain.

Sure it means throwing away years of hard-won experience and starting a blog in a new field.

But finding a domain this good must be a signal from the universe, right?

#9. You Lose Interest in Domains Moments After Buying Them

You Lose Interest in Domains After Buying Them

Once the buzz of snagging the name you’ve been lusting after subsides, a faint sense of regret can quickly follow.

“I can’t believe nobody bought this yet,” quickly turns to, “I can’t believe I just bought that.”

And the longer you hold onto a domain, the more money you rack up in wasted renewal fees.

The best way to take your mind off this painful predicament? Start scouting for your next domain name.

#10. You Have a Conspiracy Theory about Domain Registrars

You Have a Conspiracy Theory about Domain Registrars

Maybe this happened to you…

One day you check a new domain and find it available for the regular price. The next day it’s suddenly a “premium” domain, commanding several thousand dollars.

And you can’t help but wonder:

Did my search alert the registrar to the juicy potential of this previously unrecognized name?

You wouldn’t be alone in your suspicions. Type “do domain registrars” into Google and “steal domains?” is the top auto-complete suggestion.

Are registrars capable of dirty tricks like this? Maybe. It’s difficult to be sure.

But paranoid thoughts like these might be the first sign your harmless hobby is turning into a dangerous addiction.

Learn to Spot the Signs of Addiction Before It’s Too Late

Domain name addiction is real. And it can wreck your life if you don’t catch it in time.

If you suspect you might be addicted, ask yourself the following questions:

  • Do you visit domain registration sites several times a day?
  • Do you lie to friends and family about how many domains you own?
  • Do you often “binge” and buy multiple domains at once?

If so, you’re likely a domain name junkie.

The good news? With the right support, a full recovery is possible.

But you must take that crucial first step. Acknowledge your addiction.

So repeat after me:

“I’m a domain name junkie. And today’s the day I get help.”

About the Author: Glen Long is Smart Blogger’s operations guy and a recovering domain name junkie. He’s holding a “yard sale” of the best blogging, copywriting and content marketing domains that he’s collected over the years — go check it out.

The post 10 Things You’ll Only Understand If You’re a Domain Name Junkie appeared first on Smart Blogger.

Source: https://smartblogger.com/domain-name-junkie/

Uncategorized

Goal-setting for Bloggers: How to Get More Done That Matters

Are you accomplishing your blogging goals?

Are you failing on your New Year’s resolutions?

In this episode, you will discover how to get more done that actually matters.

Listen to the episode

“A goal without a plan is just a wish” – Antoine de Saint-Exupéry

Goal-setting for bloggersI have a confession to make. Over the last 7 or 8 years, I’ve been a part of an amazing mastermind group.

And at the beginning of the year, we get together to talk about our goals. Every year, I write down my goals for that year and share it with the other members of the group.

We all do it. Yet, if I’m to be perfectly honest, I can’t remember accomplishing any of the goals I shared with my mastermind groups.

They are usually large goals, and I find myself putting most of those goals back on my list the next year.

However, over the last month or so, I’ve made more progress towards my goals than I’d made in entire years previously. Why? Because of the process I’ve gone through.

A process that I believe can change your life like it has changed mine. One that will make you way more productive. But there’s good news and bad news.

The bad news: It’s going to take AT LEAST 10 to 20 hours to get set up.

The good news: It’ll save you a ton of time and help you get WAY more done.

And I want to challenge you to take this seriously. You in? Then keep reading.

Goal-setting for Bloggers

Accomplishing goals

In order to accomplish your blogging goals, it’s important for you to spend the time to work out your blogging goals.

In order to accomplish the blogging goals that really matter, they need to be understood and evaluated in the proper context.

Here are the steps I recommend you take.

Step 1 – Write down (and break down) your life goals

Wait a minute Leslie? Why are we going so deep so fast?

Here’s the fact – it will take a whole lot of work to accomplish your blogging goals, especially if they are big goals.

Starting with your life goals helps to give your blogging goals context. It helps you to get clear on your “why”.

In the episode, I walk you through a more detailed process for coming up with your life goals.

Step 2 – Write down (and break down) your business goals

Once you understand your life goals, it’s important to then think about your business goals in the context of those life goals.

Write down your goals

If you’re reading this, you are most likely trying to start a blog as a business. You’re not just in it to have an outlet. You want to actually make money from it.

Well if that’s the case, you want to set some goals for where you want your business to go. And from there, you can move on to the next step.

Step 3 – Write down (and break down) your blogging goals

Now that you have your business goals, it’s time to focus on your blogging goals in that context. By doing it this way, you know that your blogging goals will help you meet your business goals.

And since your business goals are in the context of your life goals, what you do with your blog will help you to accomplish your life goals.

I highly recommend for you to listen to the episode above to see how this all plays out.

How to Break Down Your Goals

In order to break down your goals, there are a few important questions that you want to answer. I also recommend that you write down your answers to these questions.

What is the goal?

goal-setting questions
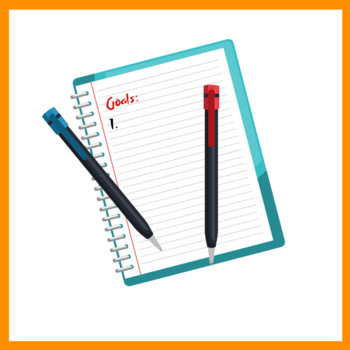
This is where you want to get specific. It’s not good enough to say I want to make money with my blog. It’s better to say I want to make money by selling my first product by a specific date.

Or I want to grow my email list to 10,000 subscribers by the end of the year. Write down your goal and be specific.

Why do I want to accomplish that goal?

If you understand why you want to accomplish your goal, you’ll be more likely to accomplish it. Write down your “why” for each goal in one sentence.

If you can’t come up with a reason why then it shouldn’t be on your goal list.

What are the benefits of reaching that goal?

If you’re setting a goal, there will be benefits associated with that goal. What are they? Write them down for each of your goals. If you can’t think of any benefits, I can’t think of a reason why you’d want to accomplish that particular goal.

What are the pains associated with not reaching that goal?

One of the things I’ve learned on my journey as a blogger is that people are more likely to take action to solve a specific pain point in their lives.

Getting clear on the pains that are associated with not accomplishing your goal will make you want to fight more to accomplish your goal.

What do I need to know to accomplish my goal?

This is where education comes in. To get to where you want to get, you will have to learn certain things. You can take courses, listen to podcasts, and even read books to help you learn what you need to learn.

However, you need to be clear on what you need to learn so that you can pursue those resources.

Who do I need to engage to help me accomplish that goal?

No man is an island. In order to get to where you want to be, there are people out there that can help you. Knowing who those people are will help you plan out your strategy from connecting with them and engaging them in the right way.

What steps do I need to take?

This is where the rubber meets the road. It’s important to come up with a plan of attack. You may not know everything that needs to be done right now. But you can at least come up with a plan of things to do to figure out what needs to be done.

Come up with a plan so that you can know what to act on.

When will I accomplish each goal by?

It’s important to set a date. Then your goal becomes real. If your anything like me, setting that specific date will help you to push harder as that date slowly creeps up on you.

Tracking your progress

Tracking goalsNow that you’ve broken down your goals, it’s important to have a way to track your progress. It’s what you do on a daily and weekly basis that will contribute to the goals that you reach on a monthly and yearly basis.
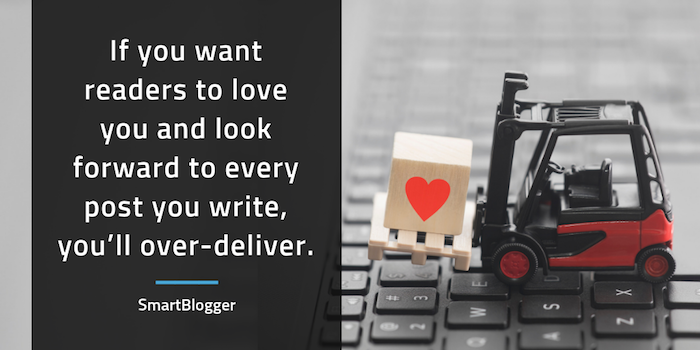
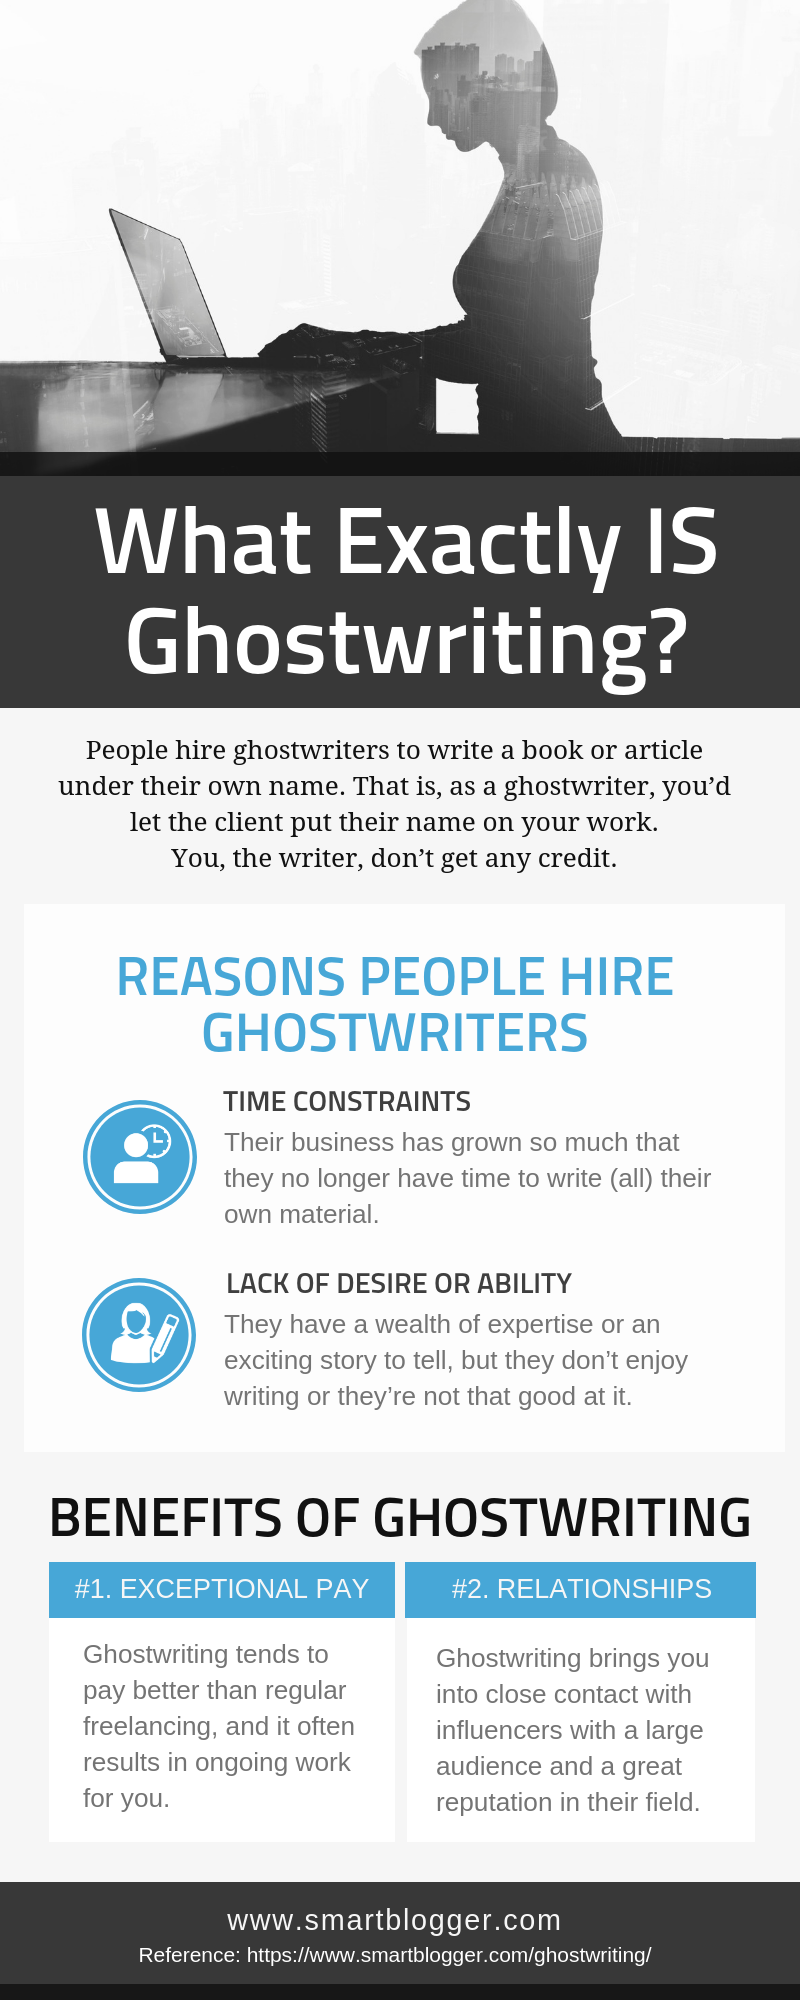
And tracking your progress will help you to continually be aware of where you are in the process and what’s left to be done.

Here are my recommendations:

Choose 3 – 5 goals to start working on

Now that you have your huge list of goals, it can be overwhelming to try to attack them all. In fact, it’s virtually impossible and you will be easily discouraged.

That’s why I recommend choosing 3 – 5 goals to start with. These are the goals you’ll be focused on right now.

Set Weekly goals

At the beginning of each week, determine what you need to accomplish that week to get you closer to accomplishing those 3 – 5 goals by the dates you specified.

Write those down at the top of your weekly planner, which can be a simple notebook or something like The Performance Planner by Zig Ziglar.

Plan your daily schedule and task for tomorrow

Every day, it’s important to plan out the next day’s schedule and tasks. The last thing you want is to wake up uncertain about what needs to be done.

Your goal is to jump to action as soon as you start your day. Knowing what to do beforehand is essential.

Of course, make sure the tasks your write down will help you accomplish the goals you are focused on accomplishing that week.

Reflect daily on what you accomplished

At the end of each day, take note of what tasks you complete.

More importantly, which goals didn’t you work on. Make a note of that. You won’t work on every goal every day. However, if you keep seeing a goal show up as not being worked on, that will prompt you to add tasks related to that goal on future days.

Reflect weekly on what you accomplished

It’s also important to evaluate how your week went. Where are you in terms of your goals? What did you accomplish? Where could you use some improvement?

What didn’t you work on as much as you would like?

Bringing it together

I know – the plan that I’m proposing here will take a lot of work. You’re welcome!

Accomplishing your goals takes work. The problem is that most people are already doing the work, but are not doing the right things to help them accomplish their goals.

By having the clarity I outlined in this episode, you’ll gain the confidence to know that you’re not wasting time. And when it’s all said and done, you’ll be checking those goals off quicker than ever before.

So what do you say? Will you take me up on this challenge? If so, let me know in the comments area below.

The post Goal-setting for Bloggers: How to Get More Done That Matters appeared first on Become A Blogger by Leslie Samuel.

Source: https://www.becomeablogger.com/26414/goal-setting-bloggers-get-more-done/